10 Easy Ways to Fix Windows 11 Automatic Repair Loop (2022)
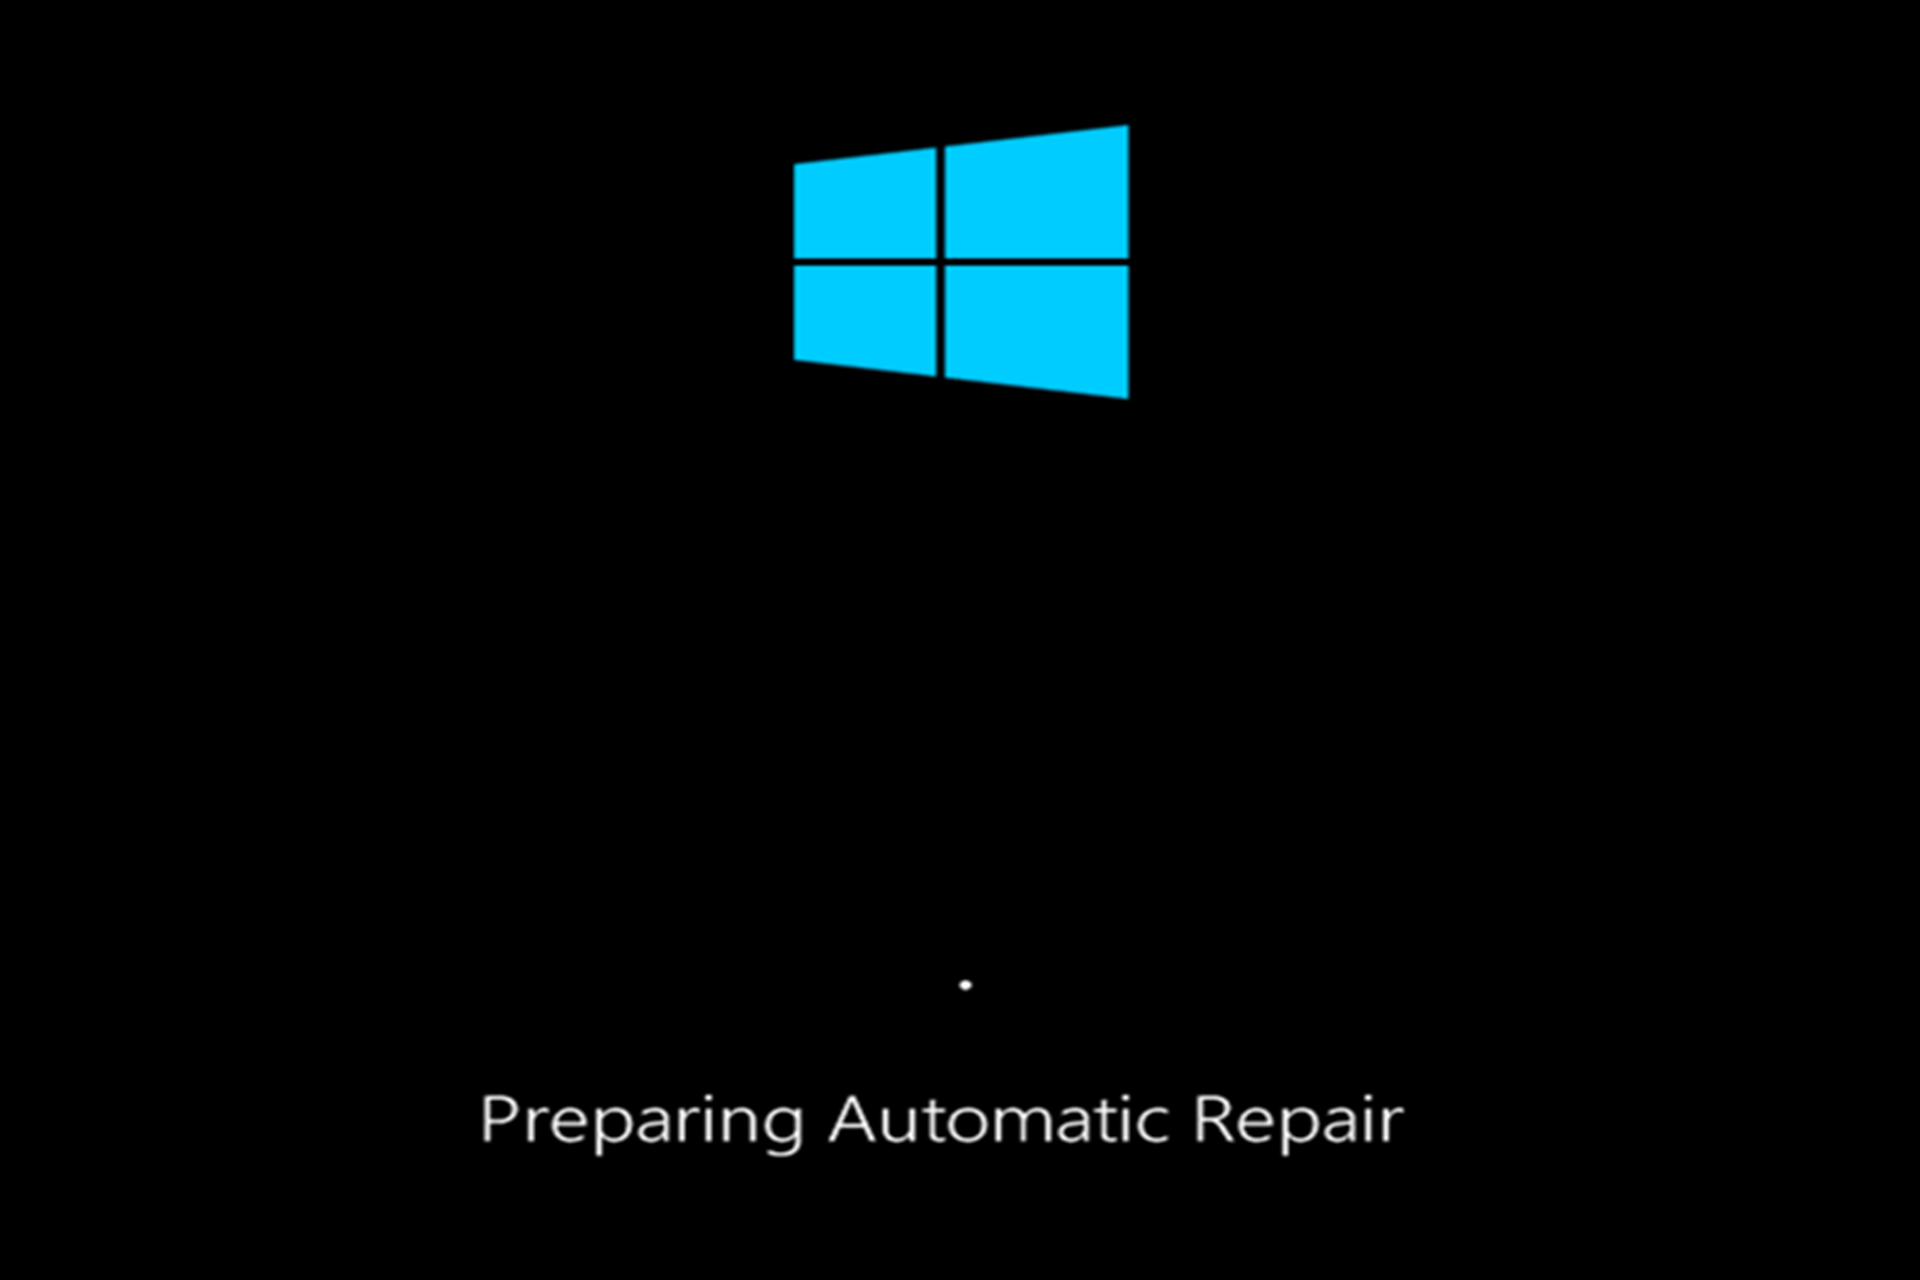
'Preparing for automatic repair' Infinite loop. Automatic Repair is a built-in feature in Windows 10 to deal with some system problems when the computer cannot boot properly. However, in some cases, Automatic Repair may not work and get stuck in the infamous Windows Automatic Repair loop. Getting stuck in the Preparing Automatic Repair loop is.
Stuck At The Windows 10 Preparing Automatic Repair Black Screen? Here 99F
Here are some ways to fix the Windows 10 Automatic Repair loop: Method 1. Perform a hard reboot. Before you get to troubleshooting via more advanced methods, try forcing your computer to shut down and attempt to power cycle. Here's how: Turn off your computer entirely by pressing the Power button.

How to fix laptop automatically turning on and off problem YouTube
Step 1: Turn off your Windows 10 laptop. Step 2: Now click on the Power Button. Immediately after clicking the Power Button, press the F8 key and then select 'See advanced repair options.
Cara Mengatasi Automatic Repair Windows 10 UnBrick.ID
To disable automatic repair during the third unsuccessful boot of Windows 11 or 10, use these steps: Open Start. Search for Command Prompt, right-click the top result, and select the Run as.

How to Repair ASUS Laptop DIY Laptop Repair laptoprepair asuslaptop howtorepair YouTube
Fix 1: Use the Bootrec Utility. The bootrec.exe utility is the first line of defense against boot errors. You can use it to fix the Master Boot Record (MBR) and regenerate the Boot Configuration Data (BCD). Don't be scared by all these acronyms - you only need to run a couple of simple commands, and the tool will take care of the rest.
How To Fix Automatic Repair On Hp Laptop
Disable System Repair. As much as System Repair is a handy tool, if it's the root cause of your problem, then disabling it—at least until you can fix it—may be the best way to get back to Windows.Open the Command Prompt in the same way you have done using the startup Advanced Options, then follow the input commands (in the guide linked above) to turn off System Repair.

Cách Sửa Lỗi Automatic Repair Cứ Lặp Lại Trên Windows 10
To do this, press the F8 key during boot up, then select See advanced repair options. In the boot troubleshoot menu, select Troubleshoot > Advanced options > Startup Settings > Restart. At the next stage, select Enable Safe Mode with Networking by selecting the 5 number key (or F5) on your keyboard.

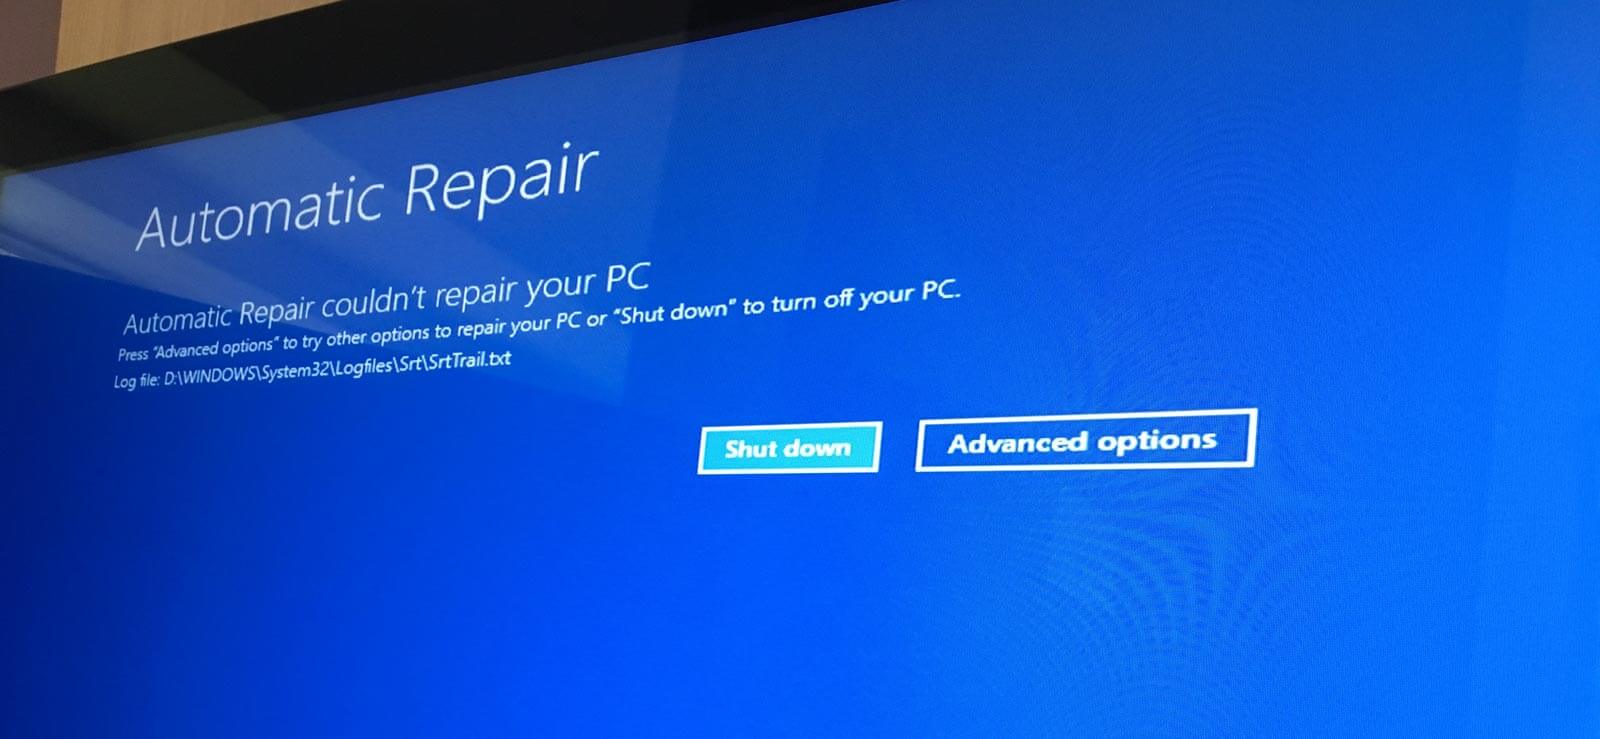
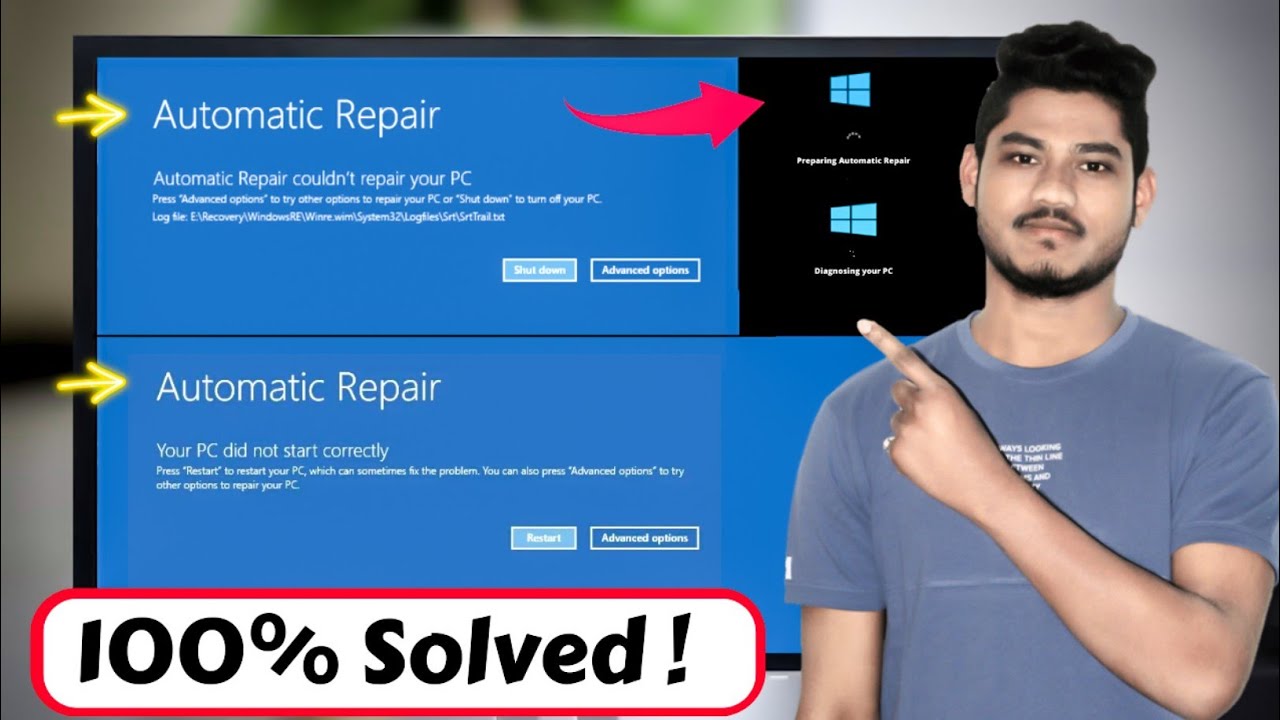
[FIXED] Automatic Repair Couldn’t Repair your PC in Windows 10
Here are the detailed steps to hard reboot a PC stuck in the preparing automatic repair 10/11 loop issue: Step 1: Press and hold the power button for 5-10 seconds to forcefully power off the computer if the normal 'Shut Down' option doesn't work. Step 2: Once the computer is fully shut down, leave it off for at least 1 full minute.
Windows 10 fix automatic restart problem pc/laptop restart and shutdown problem YouTube
In the "Choose an option" screen, choose "Turn off your PC" and then start your computer. Fix 7. Perform System Restore to Fix Windows 10 Automatic Repair Stuck. If you have created a Windows restore point before the Automatic Repair loop occurs, you can perform a system restore to cope with the issue.
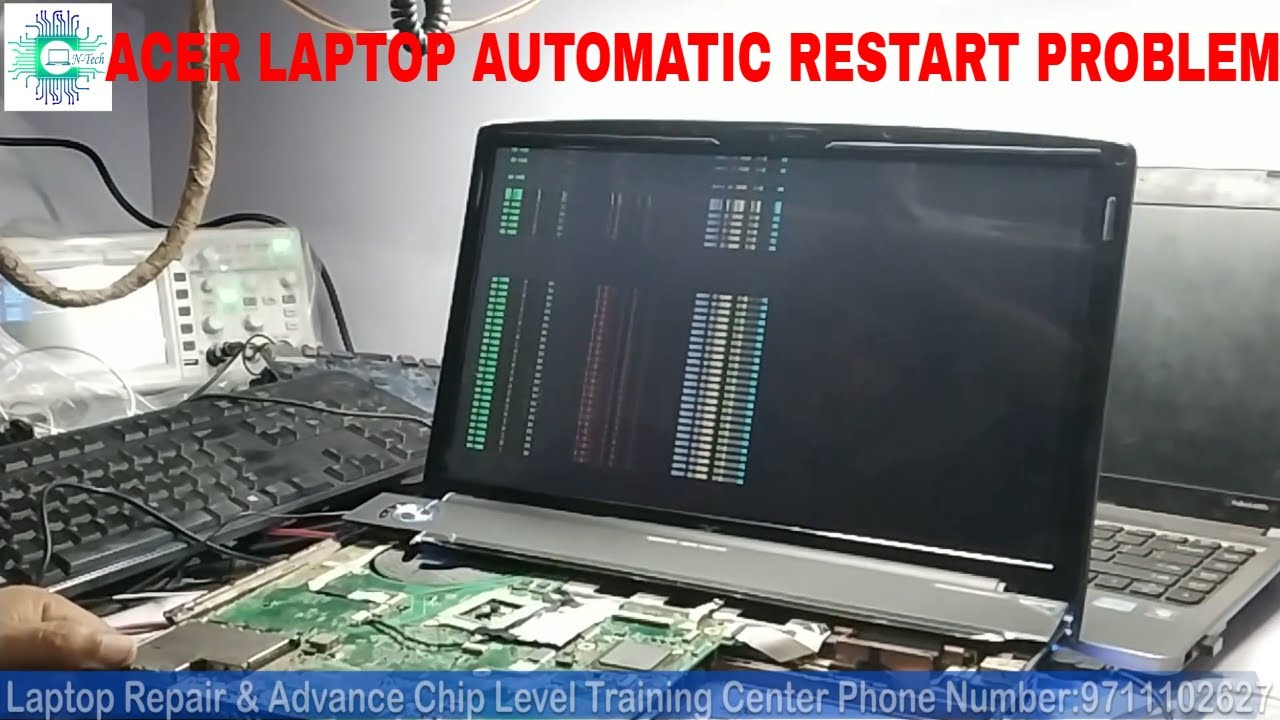
ACER LAPTOP AUTOMATIC RESTART PROBLEM YouTube
How to fix Automatic Repair Loop, Startup Repair and Master Boot Record in Windows 10 - 5 WAYSIn this video we'll look at how you can fix your the automatic.
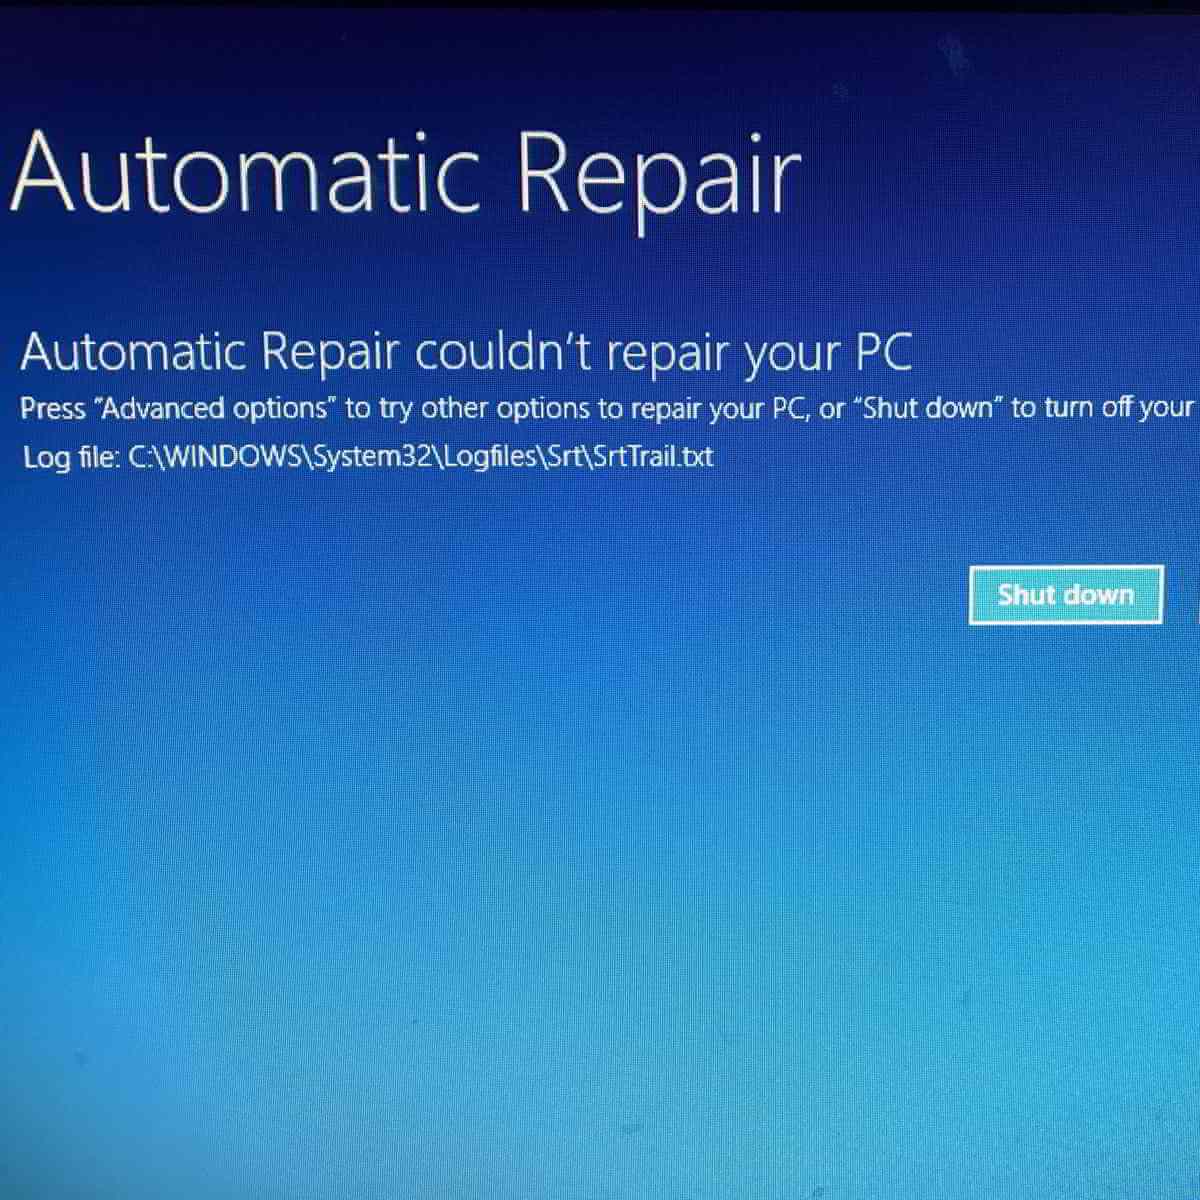
FIX Automatic Repair Couldn’t Repair Your PC on Windows 10
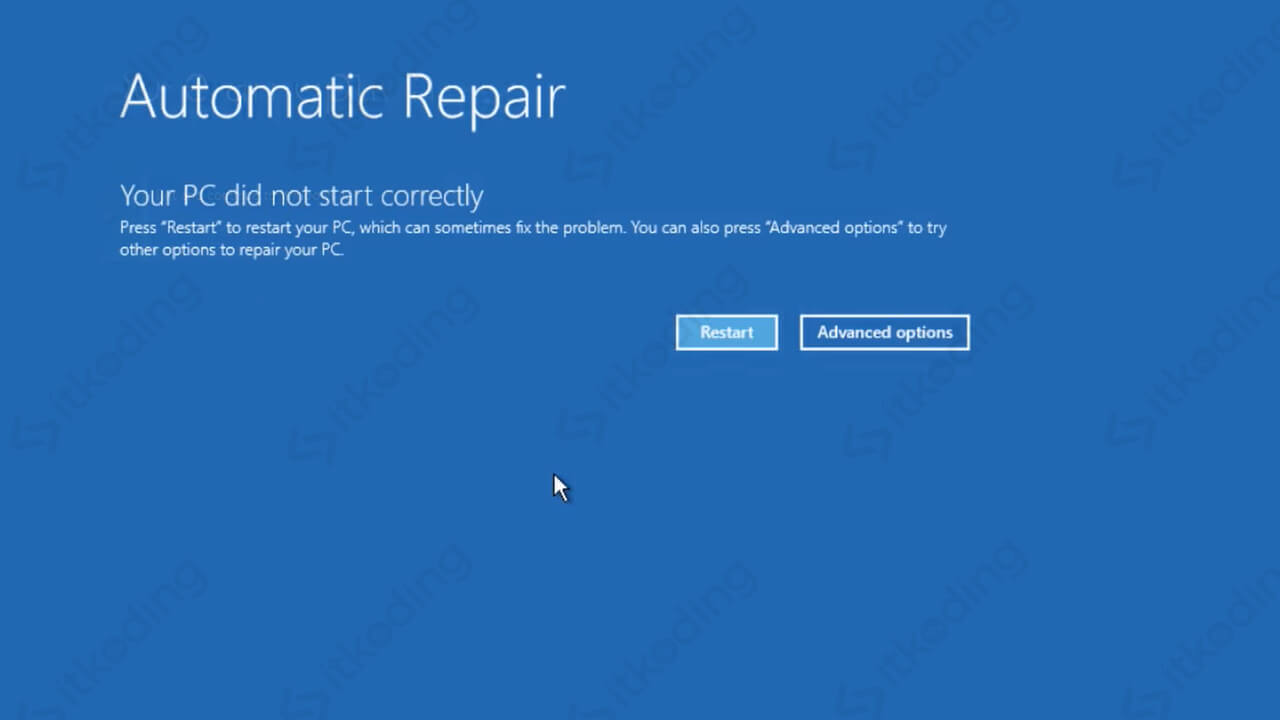
Solution 1: Restart your Surface. On the Automatic Repair screen, select Restart. If Windows starts: Install the latest Surface and Windows updates to help prevent future problems. For more info, see Download drivers and firmware for Surface. If Windows doesn't start: Go to Solution 2.
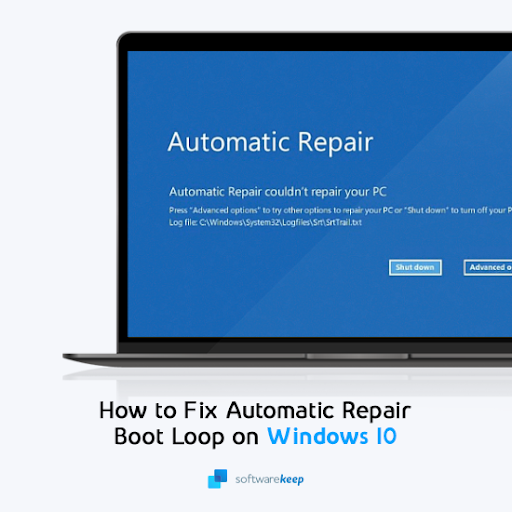
Fix Windows 10 Stuck in "Preparing Automatic Repair" Loop
This video shows how to fix startup error with automatic repair loop in Windows10.- Get genuine Windows keys at 𝑷𝒓𝒊𝒎𝒆 𝑻𝒆𝒄𝒉 𝑴𝒂𝒓𝒕.

How To Fix Automatic Repair; Your PC Did Not Start Correctly In Windows 10 [ Ultimate Guide
Restart your PC and press the "F8" key (this will trigger the Windows troubleshooting menu) Select "See advanced repair options". In the "Choose an option" menu, click "Troubleshoot". Under the "Troubleshoot" menu, select the "Advanced options" option. Select "Command Prompt" in the "Advanced options". In the.

Fix ASUS Laptop Automatic Shutdown Problem 2022 Asus Laptop Auto Power Off Hota Hai YouTube
Step 1: Insert the bootable media into your computer and boot from it. Step 2: Select your language preferences, and click on Next. Step 3: Click on Repair your computer. Step 4: Select Troubleshoot > Advanced Options > Startup Repair. Step 5: Wait for the repair to complete.

Pc Automatic repair problem solve easy way 2020 Bangla100 worked.laptop automatic repair
Restart your PC. When you get to the sign-in screen, hold the Shift key down while you select 'Power' > 'Restart'. After your PC restarts to the 'Choose an option' screen, select 'Troubleshoot' > 'Advanced options' > 'Startup Settings' > 'Restart'. After your PC restarts, you'll see a list of options. Select 4 or F4 to start your PC in Safe Mode.
Lenovo Laptop Automatic Repair Loop in Windows 7,10,11 Startup Repair Couldn’t Repair Your PC
Disable Automatic Startup Repair. The simplest solution might be to turn off the "Automatic Startup Repair" feature. To do this, click "Troubleshoot" in the Automatic Repair menu. In the Troubleshoot window, click "Advanced options." In Advanced options, click "Command Prompt." In the Command Prompt window, type the following command: "bcdedit /set {default} recoveryenabled No" and press Enter.