Pricing WP Mail SMTP
To do this, switch to the 'Email Test' tab from the top of the WP Mail SMTP settings page. Once you are there, simply add an email account that you have access to in the 'Send To' field. After that, go ahead and click the 'Send Email' button. Once the email has been sent, you will see a success message on your screen.
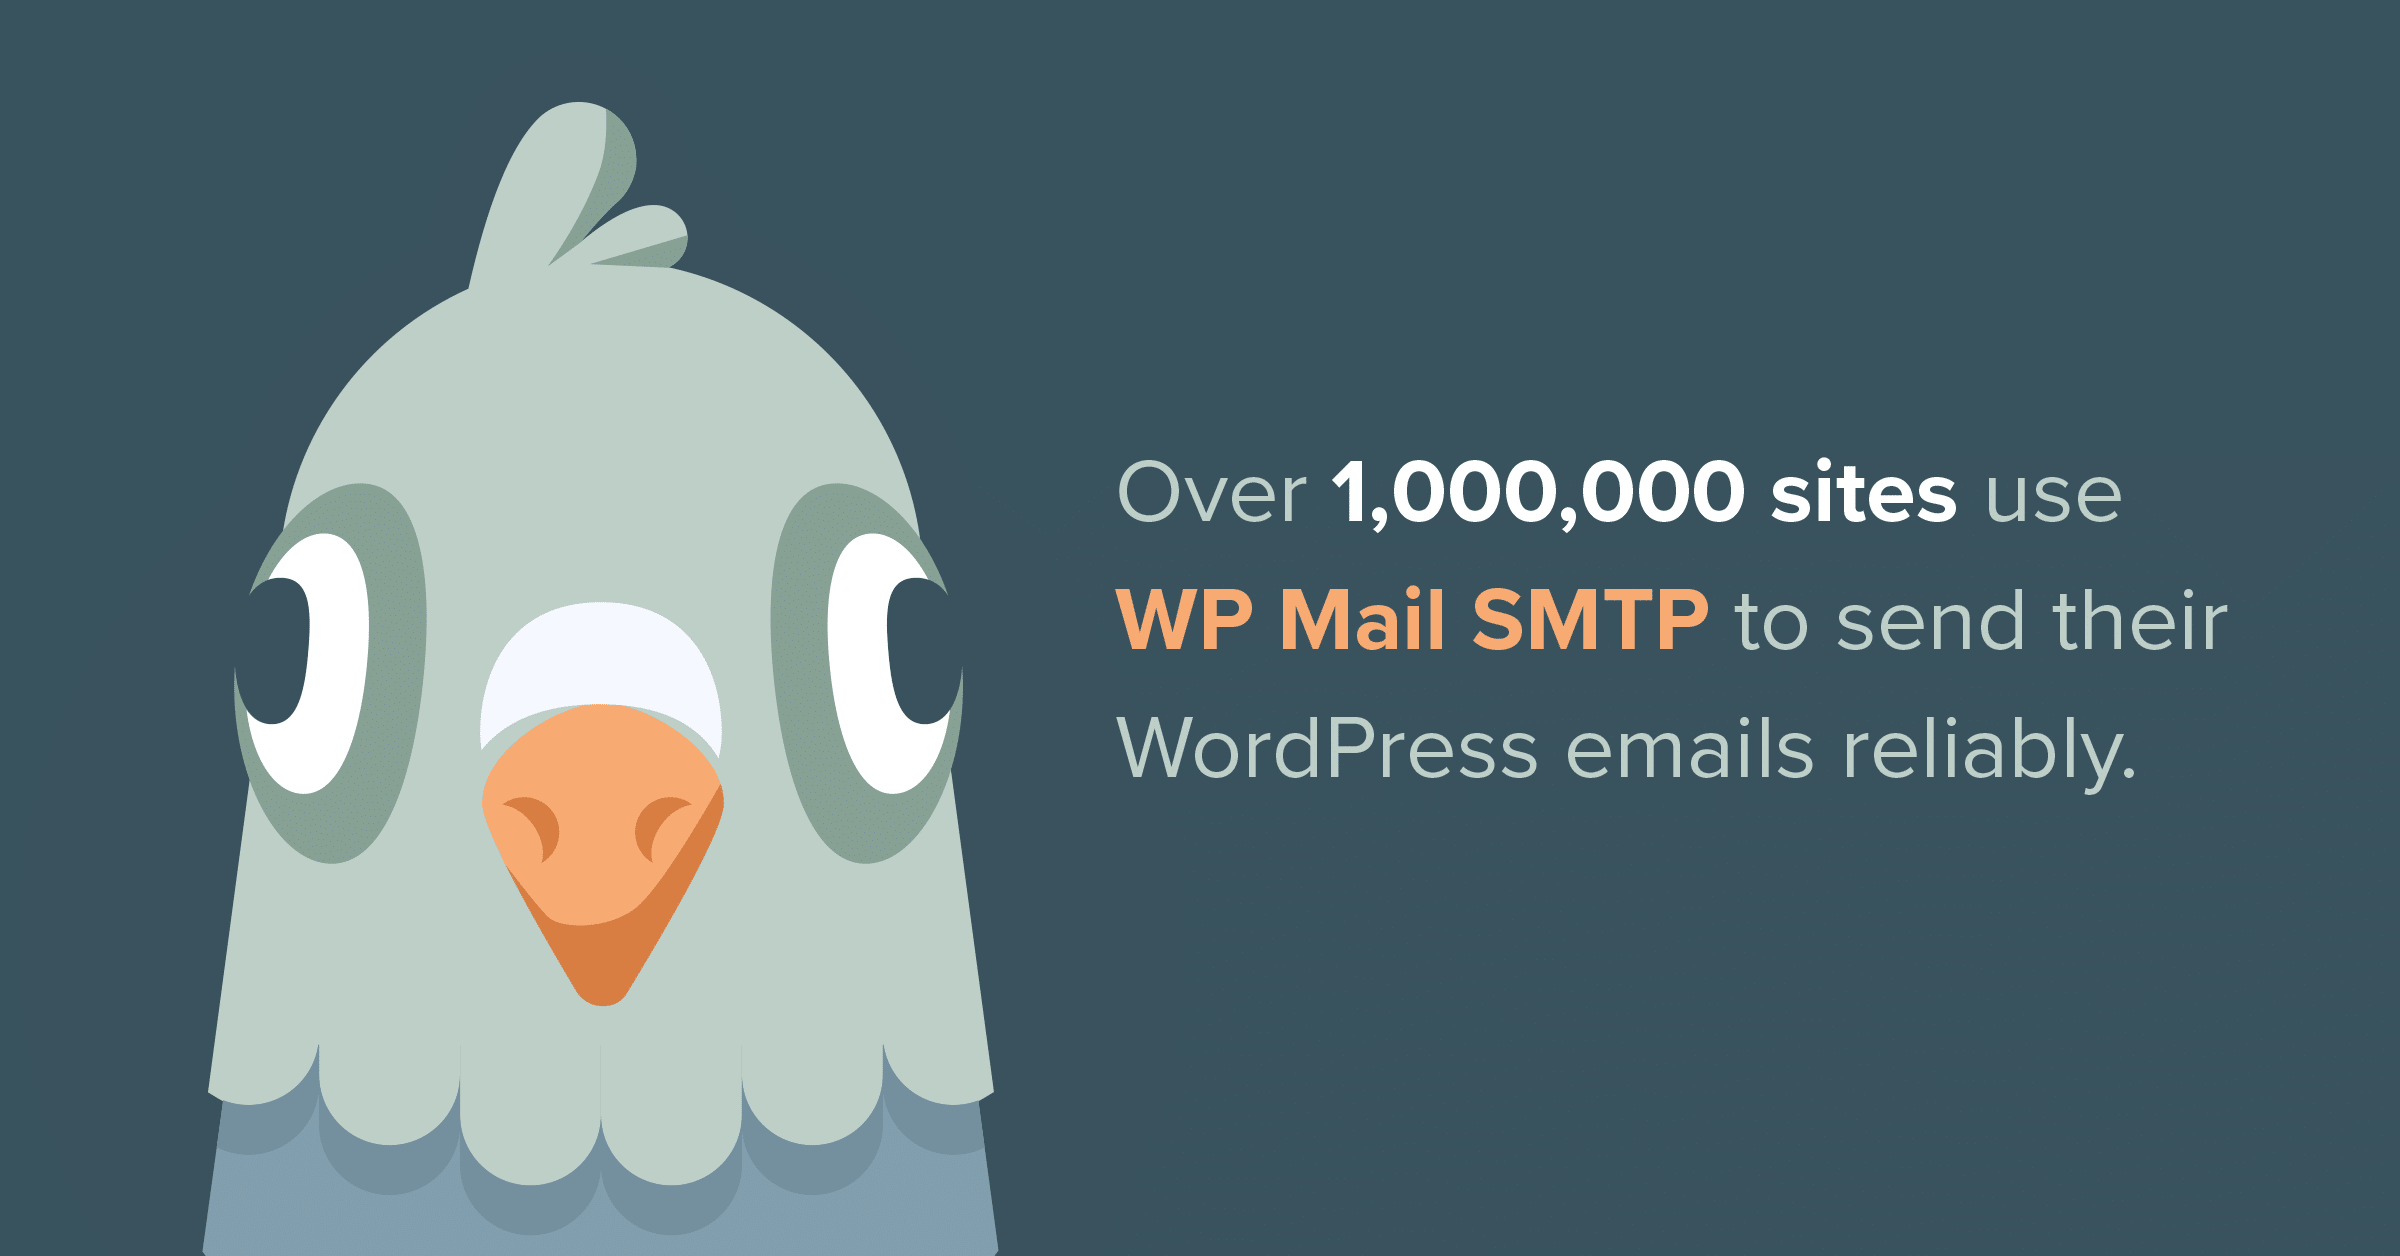
WP Mail SMTP Pro 1 WordPress SMTP Plugin in the World
1. Login WordPress. Pastikan kamu bisa melakukan login WordPress. Untuk melakukan login WordPress, silahkan buka namadomain/wp-admin di web browser. Lalu masukkan username dan password. 2. Memilih Plugin WP Mail SMTP. Setelah masuk dashboard WordPress, silakan perhatikan pada sidebar sebelah kiri. Silakan pilih Menu Plugins lalu klik Add New.
How to Send Email in WP easily Configuring Gmail SMTP from WordPress
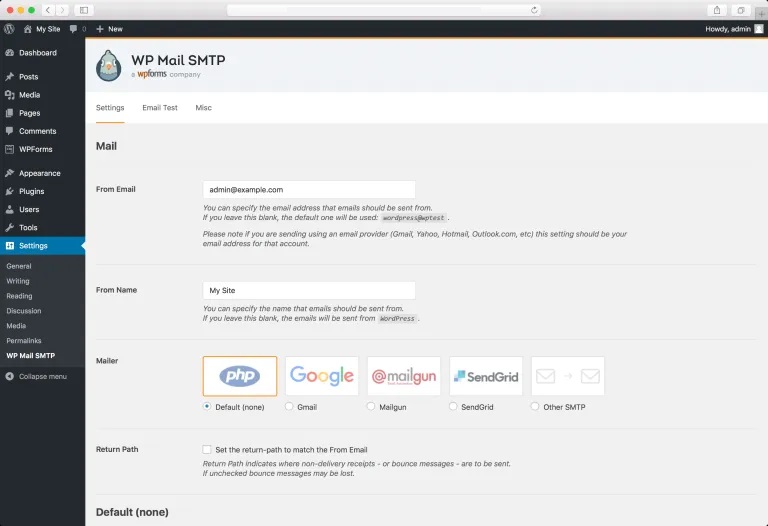
Just click on 'Go back to the Dashboard'. Next, you need to visit the WP Mail SMTP » Settings page to configure the plugin settings. You need to enter your SMTP settings to use WP Mail SMTP. The first part of the settings will be similar regardless of your hosting company.

How to Configure WordPress SMTP Settings to Send Emails
Configuring Email Test Settings. Before getting started, you'll need to install and activate the WP Mail SMTP plugin. Once you've installed the plugin, navigate to WP Mail SMTP » Tools and open up the Email Test tab. This will open up settings you can configure before sending out your test email. We'll go over each of the settings below:

Setting Plugin SMTP WordPress Untuk Pengiriman Email
Pada panduan ini, kami akan memberikan cara WordPress SMTP setup menggunakan email gmail. WordPress SMTP setup menggunakan akun Gmail. Ada setidaknya 3 cara yang bisa Anda lakukan, untuk setting WordPress SMTP Setup menggunakan gmail, yaitu melalui password application, API atau manual dengan mengaktifkan fitur less secure dan unlock capctcha.

Panduan Konfigurasi Plugin SMTP WordPress IDwebhost
Step 1: Install the WordPress Plugin. There are several SMTP WordPress plugins that you can use. We'll use the WP Mail SMTP plugin. It's a popular plugin and used in well over 2 Million websites. Go ahead and install the plugin. Once the WordPress plugin is activated, head over to WP Mail SMTP > Settings and scroll down to the Mailer section.

Configure GMail SMTP Settings For Wordpress WP Guide WP Site Care
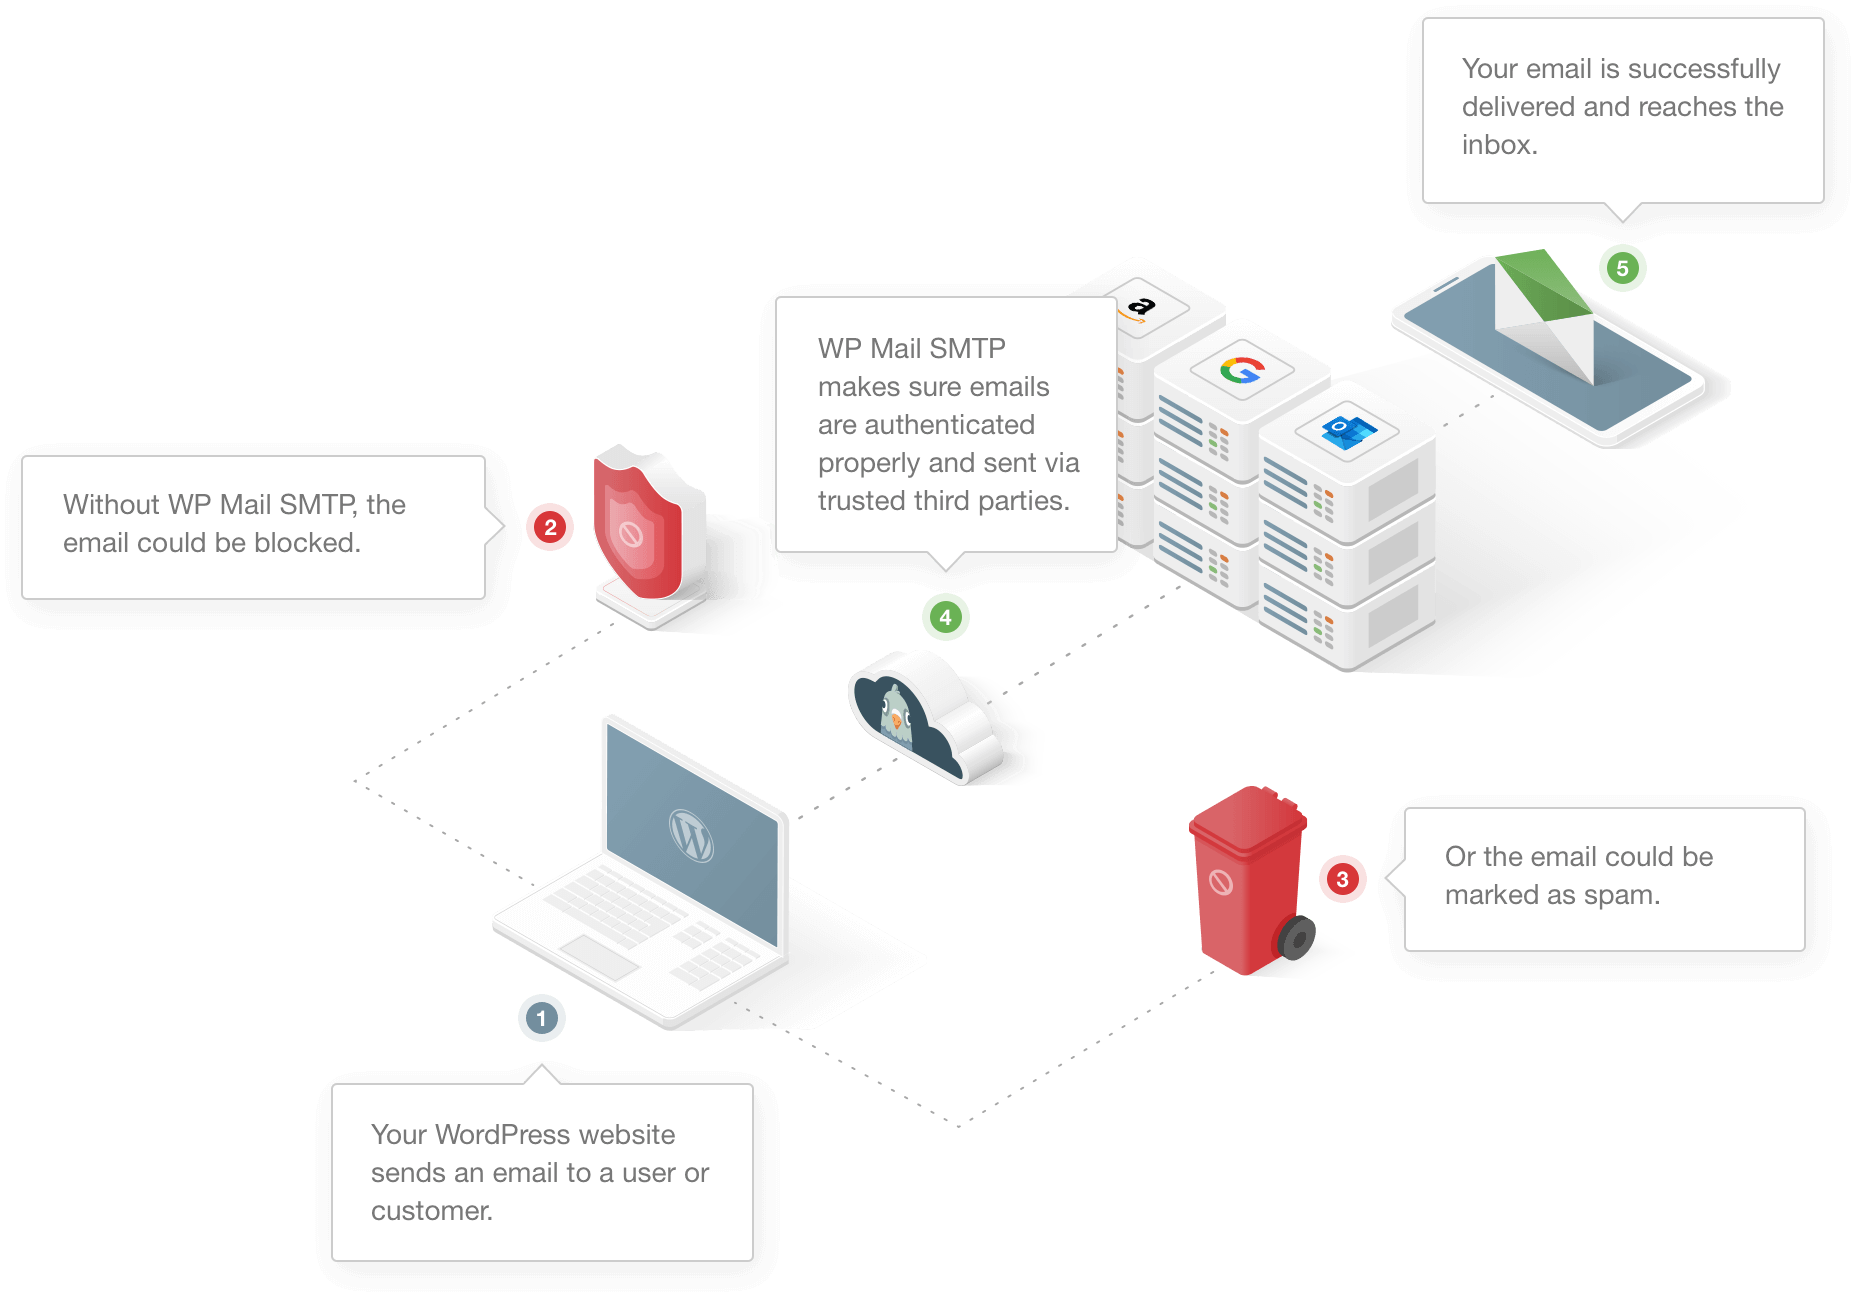
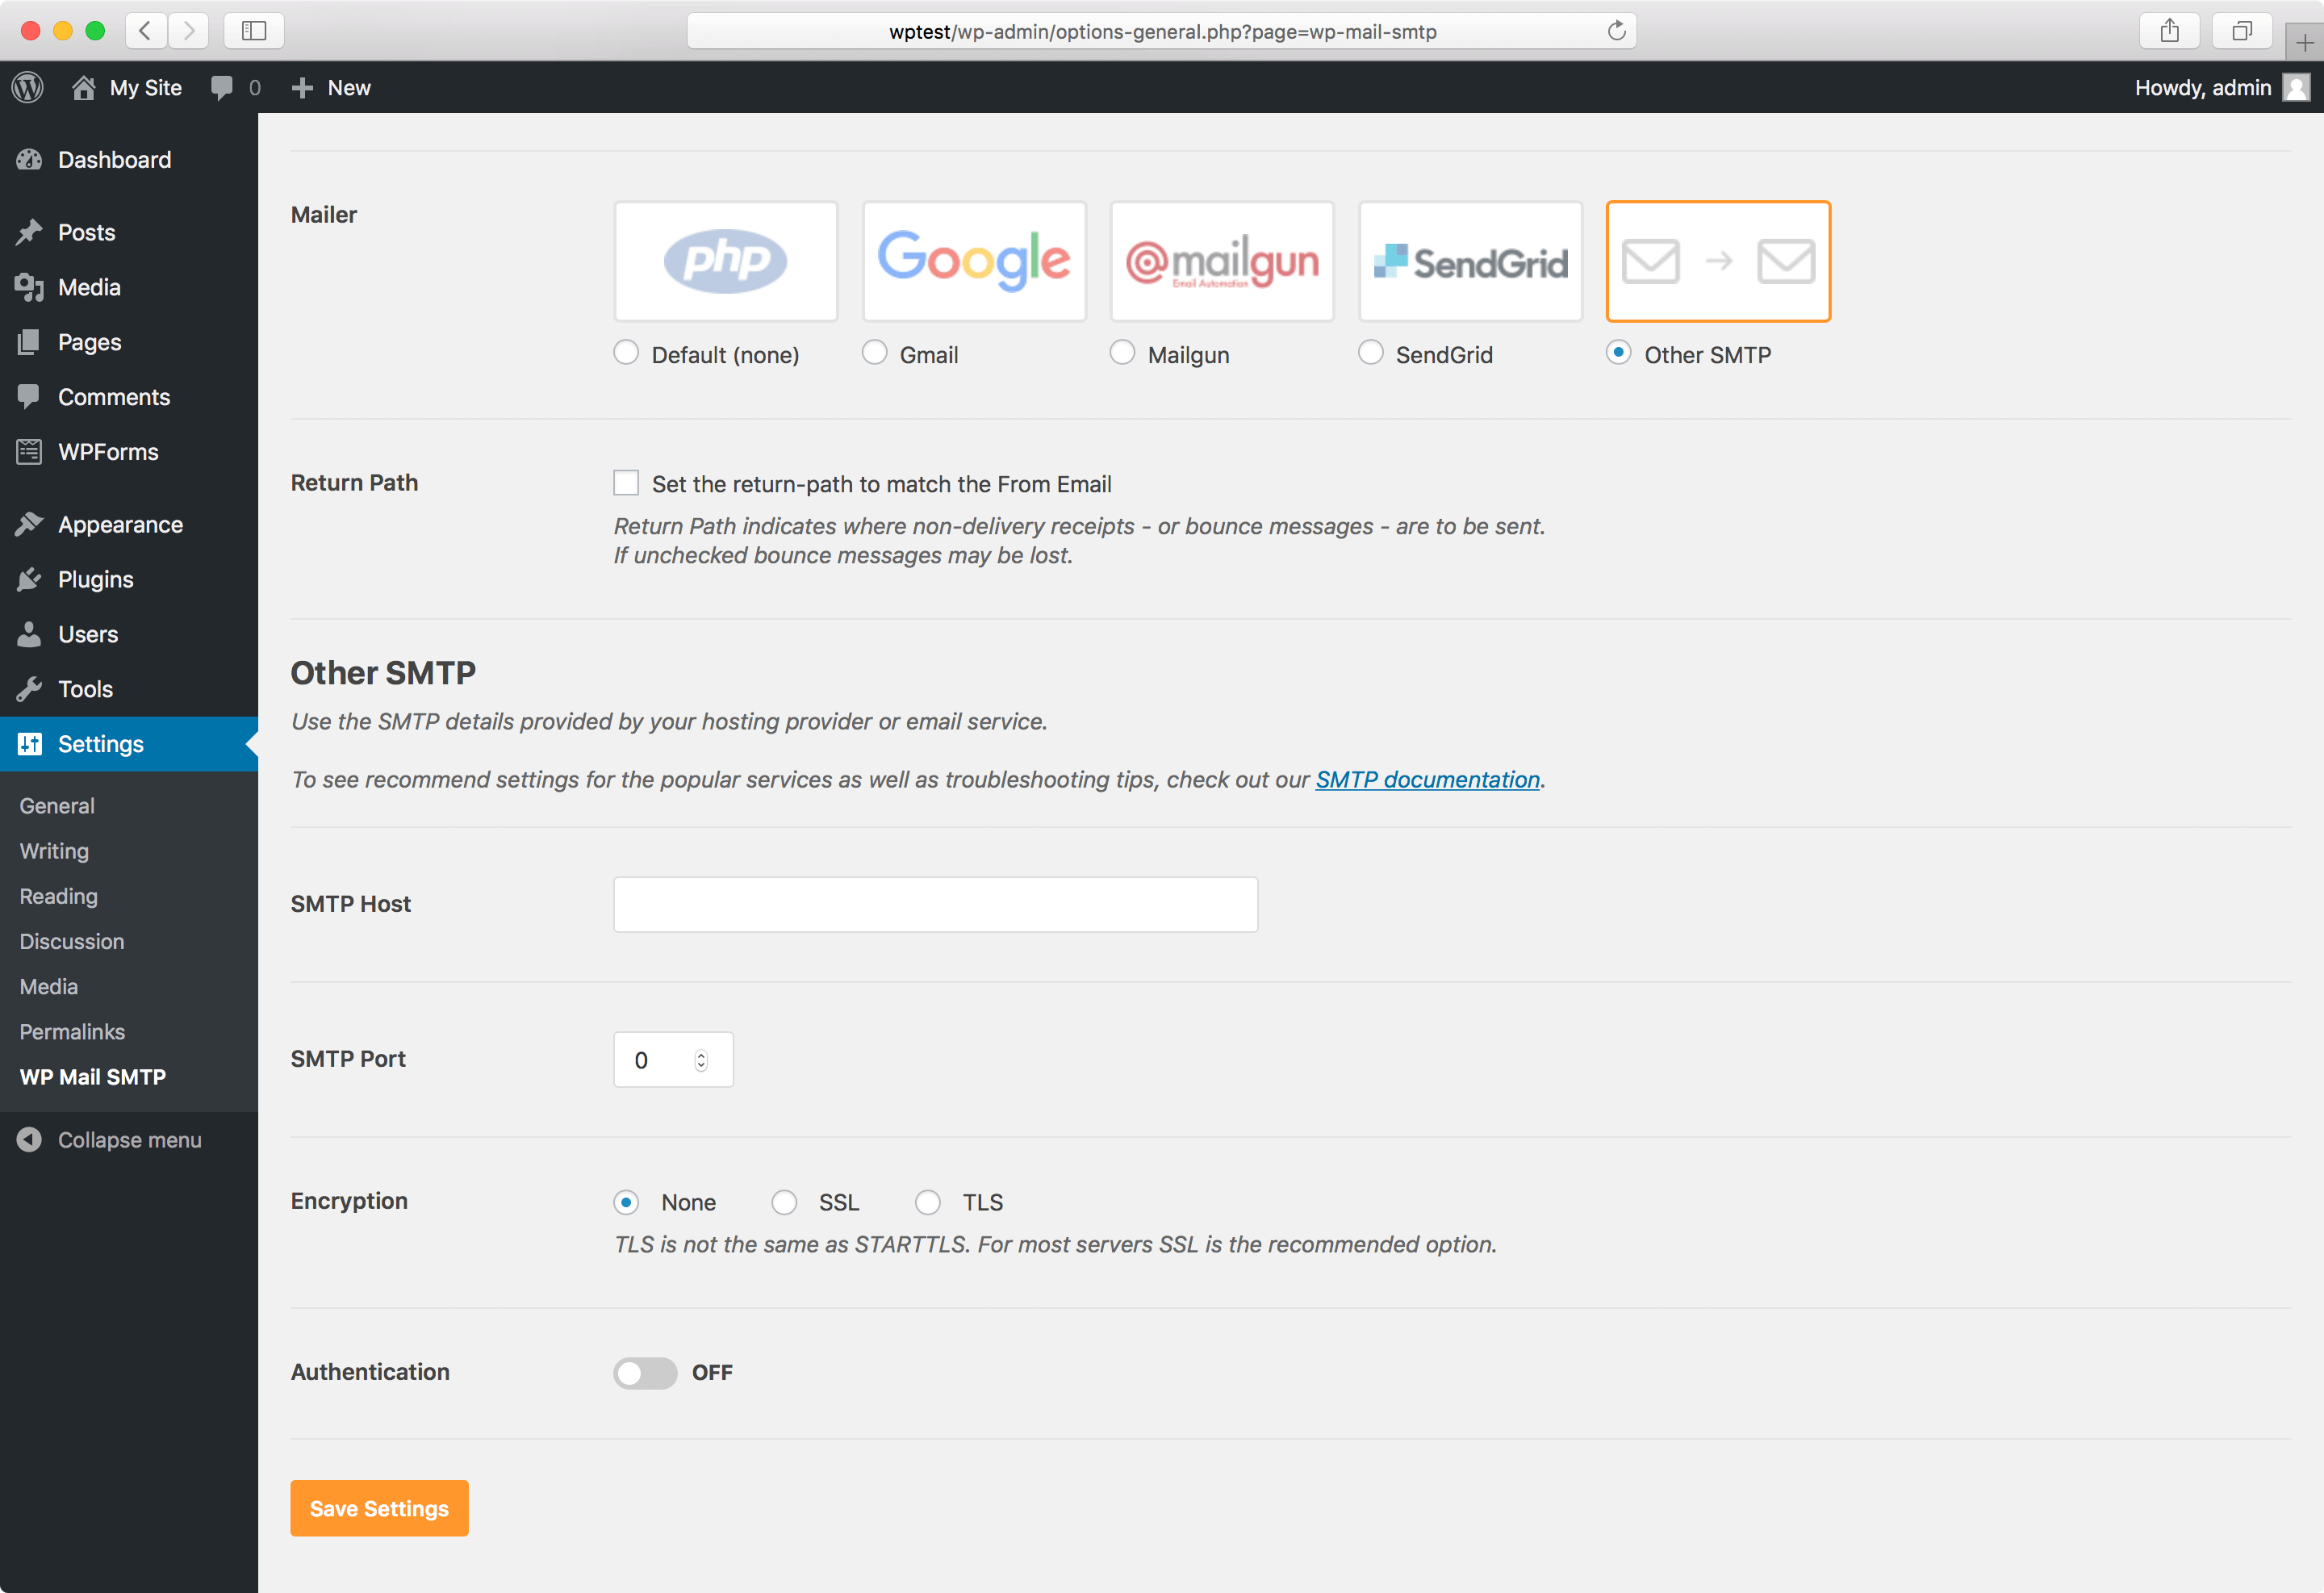
WP Mail SMTP plugin also works with all major email services such as Gmail, Yahoo, Outlook, Microsoft Live, and any other email sending service that offers SMTP. You can set the following options: Specify an SMTP host.

How to set up SMTP authentication in WordPress Kualo Limited
Settings Plugin Easy WP SMTP. Untuk setting plugin Easy WP SMTP di WordPress, ikuti langkah-langkah berikut: Reply-to Email Address: Masukan sesuai alamat email pengirim. Pada bagian ini masukan data sesuai konfigurasi server SMTP yang telah dibuat pada langkah sebelumnya. SMTP Username: Masukan alamat email Anda yang terdaftar di cpanel/hosting.

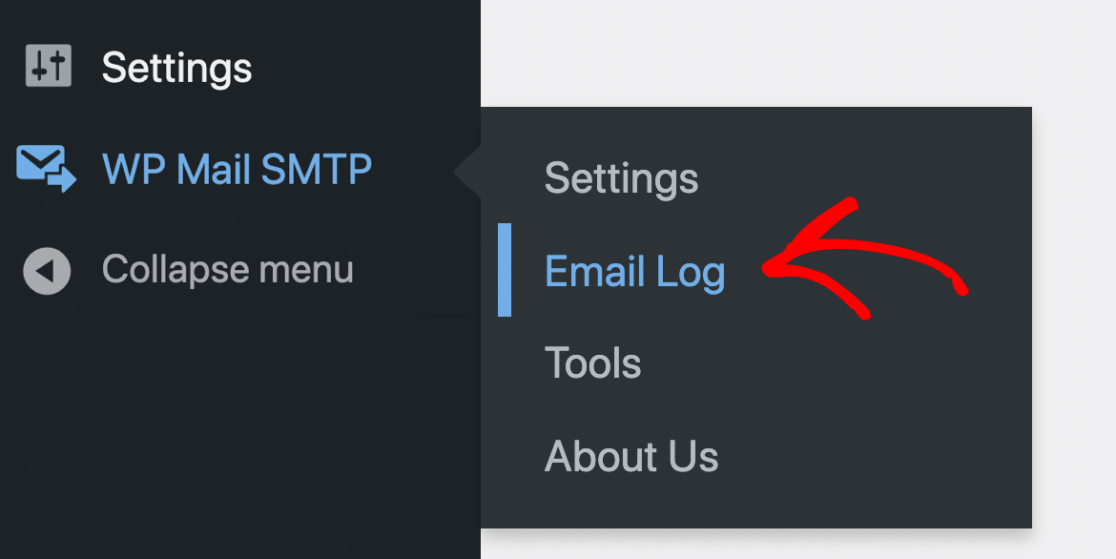
How to set up WordPress Email Logs with WP Mail SMTP
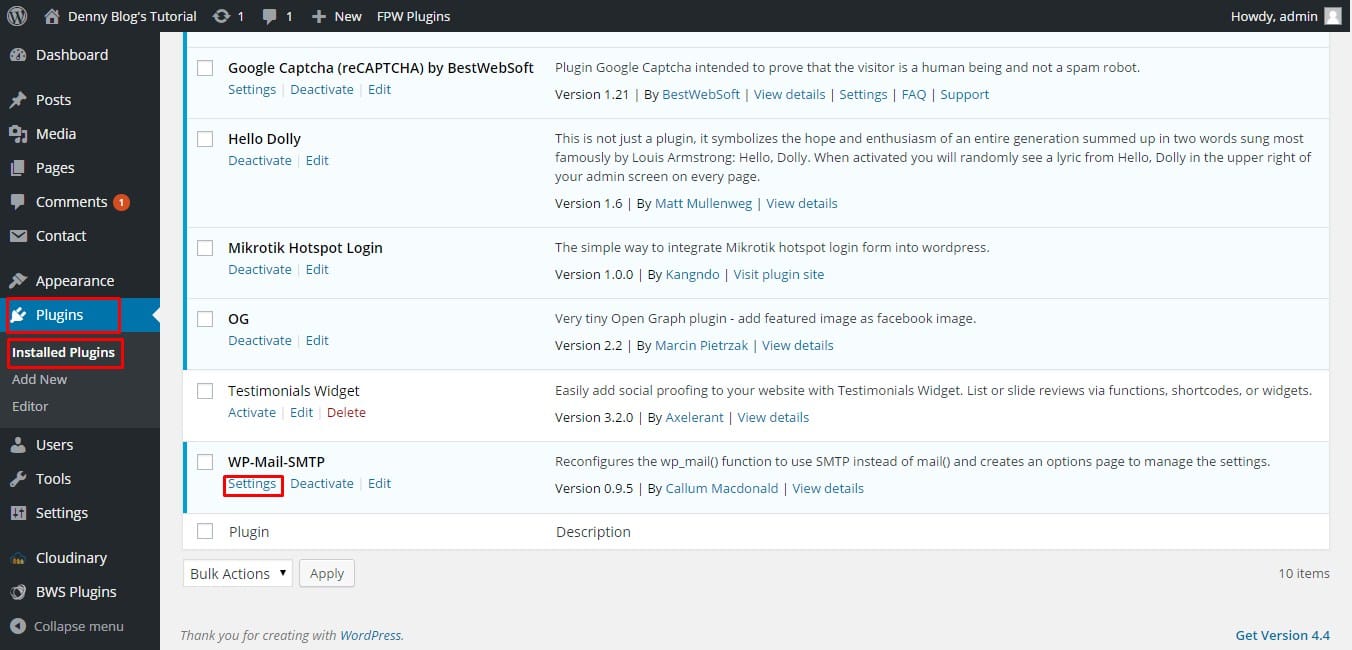
Anda bisa menggunakan plugin tambahan seperti WP Mail SMTP maupun Easy WP SMTP. Pada panduan ini, kami akan berbagi cara install plugin SMTP menggunakan WP Mail SMTP. Cara Install Plugin SMTP WordPress. Berikut langkah-langkah untuk melakukan instalasi plugins WP-Mail-SMTP: Login ke dashboard WordPress Anda. Klik menu Plugins > Add New, lalu.
How to Configure Your WordPress SMTP Settings to Send Email
1. Masuk ke dashboard WordPress Anda. 2. Pilih menu Plugins dan klik submenu Add New untuk menambahkan plugin baru. 3. Ketika " WP Mail SMTP " pada kolom pencarian. Setelah plugin ditemukan, klik tombol Install Now untuk memasang plugin. 4. Setelah plugin berhasil terpasang, aktifkan plugin dengan klik tombol Activate.
How to Configure WordPress to Use SMTP For Sending Emails
1. Launching the Setup Wizard. To begin, you'll need to launch the Setup Wizard from the WordPress dashboard by navigating to WP Mail SMTP » Settings. Then click on Launch Setup Wizard below the Primary Connection section. Note: The Setup Wizard can only be used when setting up your Primary Connection.

WordPress SMTP Setup Menggunakan Email Gmail
Cara Install Plugin SMTP WordPress. Berikut langkah-langkah untuk melakukan instalasi plugins WP-Mail-SMTP : Login ke dashboard WordPress Anda. Klik menu Plugins > Add New, lalu ketikkan WP Mail SMTP pada kolom pencarian seperti berikut lalu klik tombol install. Selanjutnya klik tombol 'Activate' lalu akan muncul halaman setting wp mail.

Cara Setting Plugin Easy WP SMTP Blog
First, you need to visit the Settings » WP Mail SMTP page to configure the plugin settings. Start by providing the Gmail address you want to use in the 'From Email' field and your name in the From 'Name' field. Next, you need to select 'Other SMTP' as your mailer. Also, check the box next to the return path.

Cara Setting Plugin Easy WP SMTP Untuk Mengganti Email Utama di
Step 4 - Send a test email. Go to your WP Mail SMTP settings page.; Click on the tab Email Test.; For the recipient, enter a different mail address you can access.; Click the orange button "Send Email" and wait for a few seconds. (HTML can be on or off.) If the email was sent successfully, you will see the message, "The test email might have been sent, but its deliverability should be improved."
Setting smtp pada plugin contact form 7 di wordpress
Installing and Configuring the WP Mail SMTP Plugin. Before getting started, you'll need to install and activate the WP Mail SMTP plugin.. Once you've verified your license, you're ready to configure the plugin's settings.You can find them by going to WP Mail SMTP » Settings and looking under the General tab.. Below, we'll cover the settings needed for this setup.

WP Mail SMTP Review 2023 1 SMTP Plugin for WordPress
Setting Plugin WP Mail SMTP dengan Sendinblue. 1. Anda bisa melakukan setting melalui menu WP Mail SMTP > Klik submenu Setting. Setelah itu, silahkan Anda isi informasi pada From Email dan From Name sesuai dengan data yang Anda masukkan di Sendinblue pada langkah nomor 8 di menu daftar.