
Wood Slice Christmas Ornaments Christmas ornaments, Christmas ornament crafts, Xmas crafts
Table of Contents. DIY Wood Slice Ornaments with Mod Podge Photo Transfer. Supplies. Step 1: Print photo with laserjet or dry ink printer. Step 2: Cut photo to size. Step 3: Apply image transfer medium. Step 4: Use a wet sponge or cloth to remove paper. Step 5: Seal the finished image transfer (optional) Another DIY Image Transfer Project.

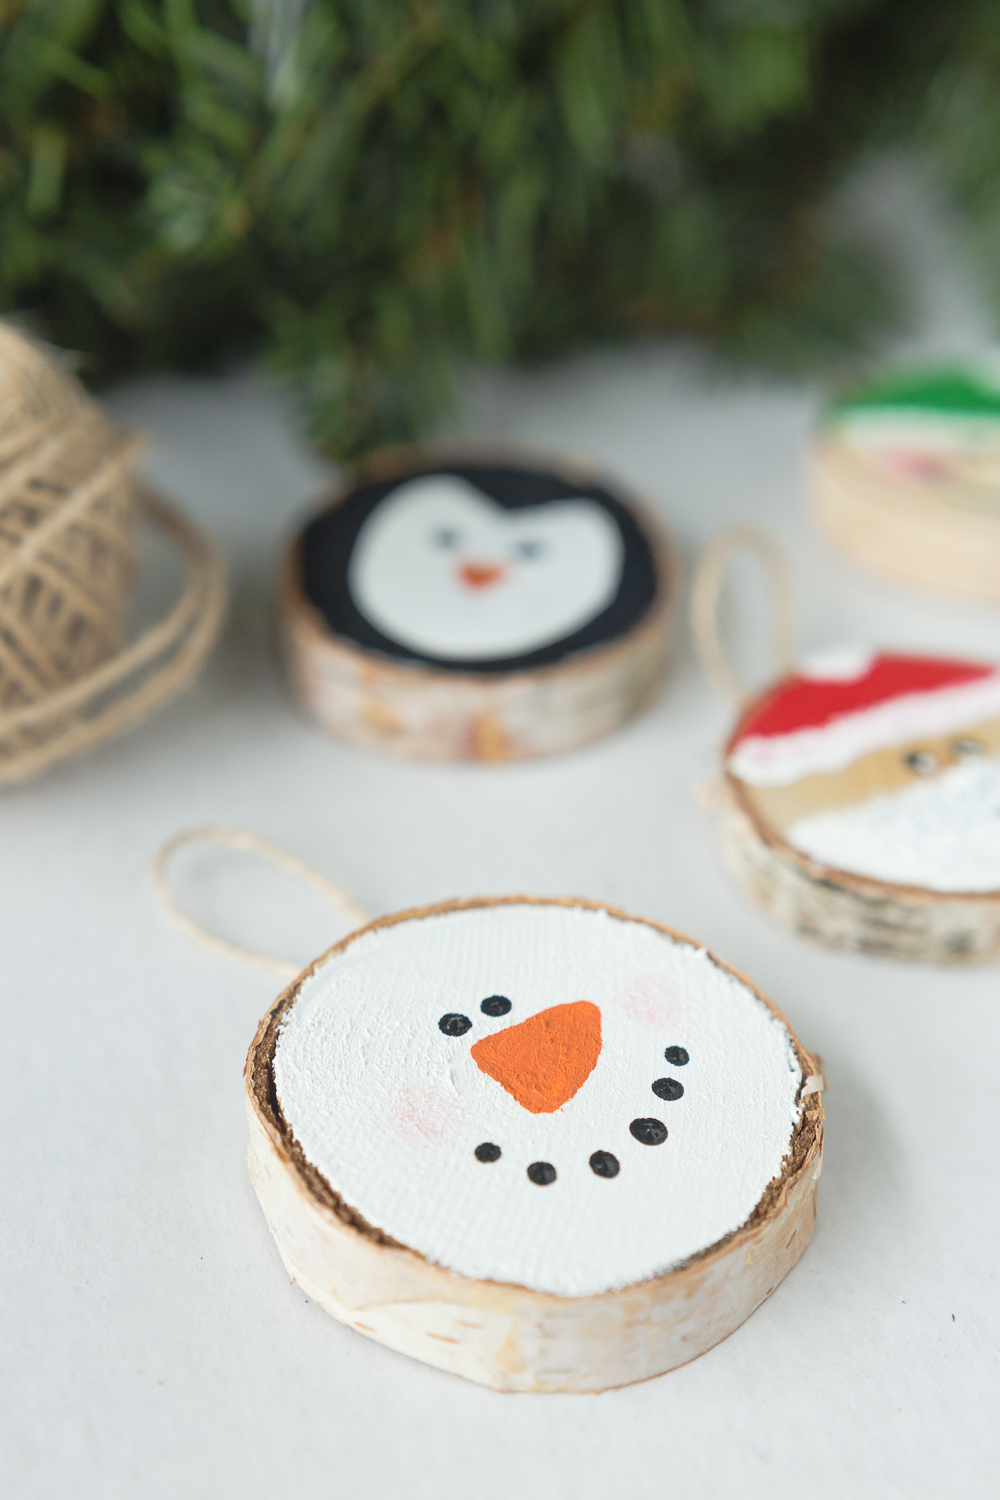
Make an easy wood slice snowman Christmas ornament It's Always Autumn
Step 8 - Finishing Touches. Add an outline of gold acrylic paint around the outer edge of the wood slice. And as a final step add ribbon or twine to the hole in your wood slice so that the finished ornament can be hung on a Christmas tree. You can also turn the ornament into a keepsake with a note on the back of the wood slice and the year.
How to Make DIY Rustic Wood Slice Ornaments The Super Mom Life
Let the wood slices dry completely before assembling the ornaments. 3. Assemble your DIY wood slice photo ornaments. After your wood slices are completely dry, you can finish assembling the ornaments. Insert one screw eye in to the top of each wood slice. If needed, use a drill with a similar sized drill bit to make a pilot hole.
11 DIY Wood Slice Christmas Ornaments To Make Shelterness
How to make Wood Slice Ornaments. Alright, now for the fun part! Let me show you have to put these Christmas wood slice ornaments together! On to step one… 1. Paint Wood Slices and Beads. To begin, paint your wood rounds and beads using the black and white acrylic paint.

Cardinal Christmas Ornament hand painted wood slice Etsy Wood christmas ornaments, Christmas
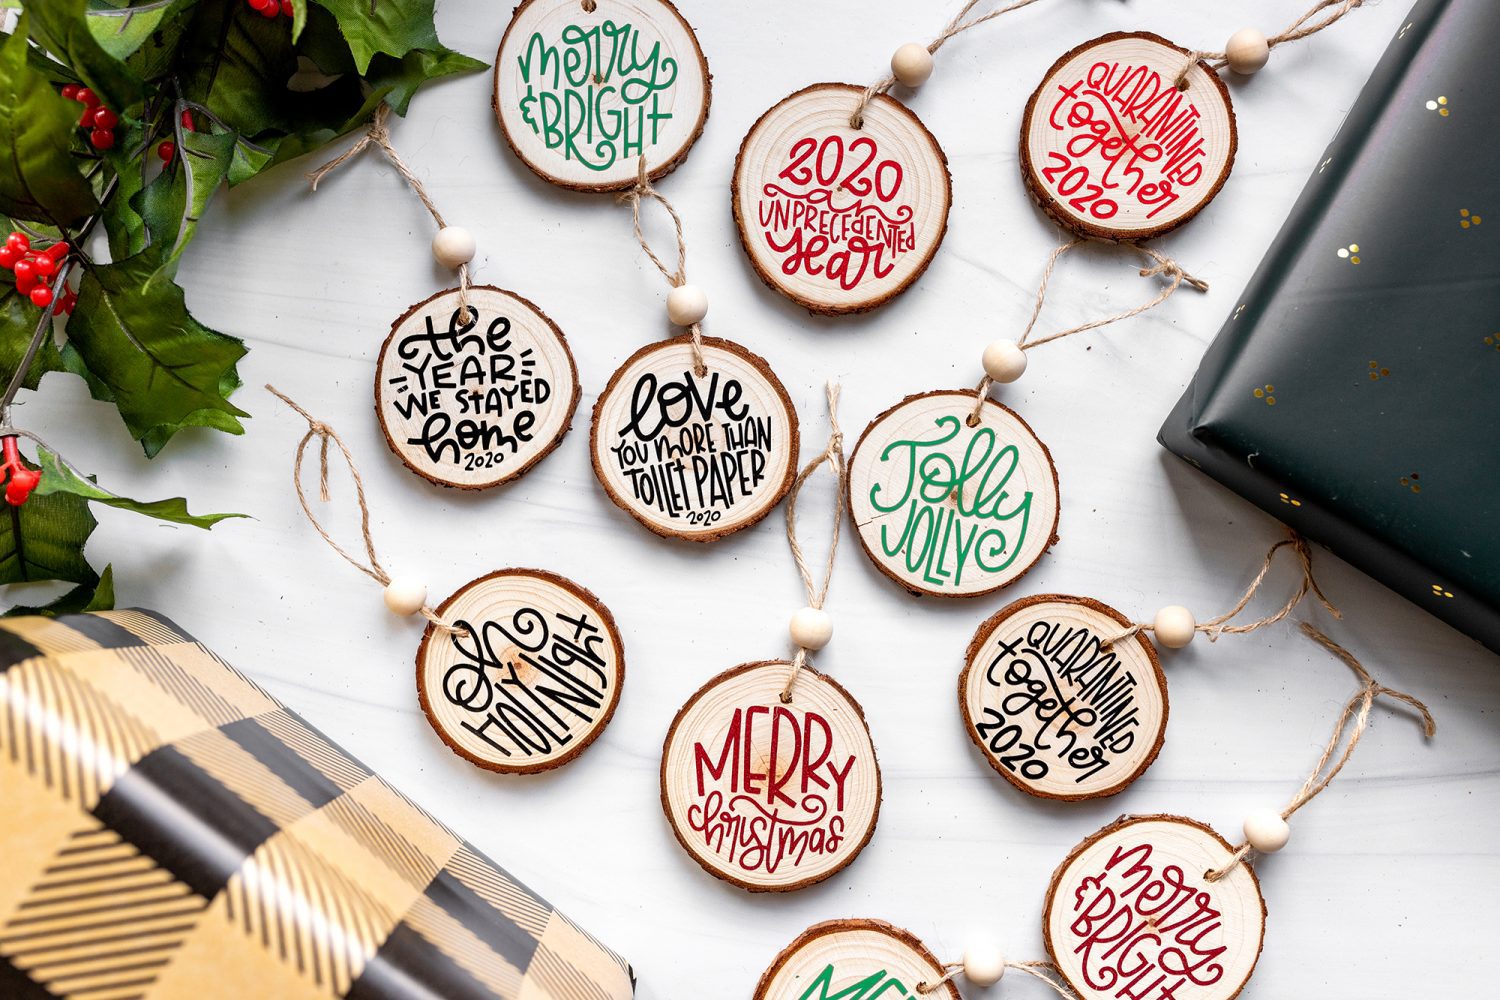
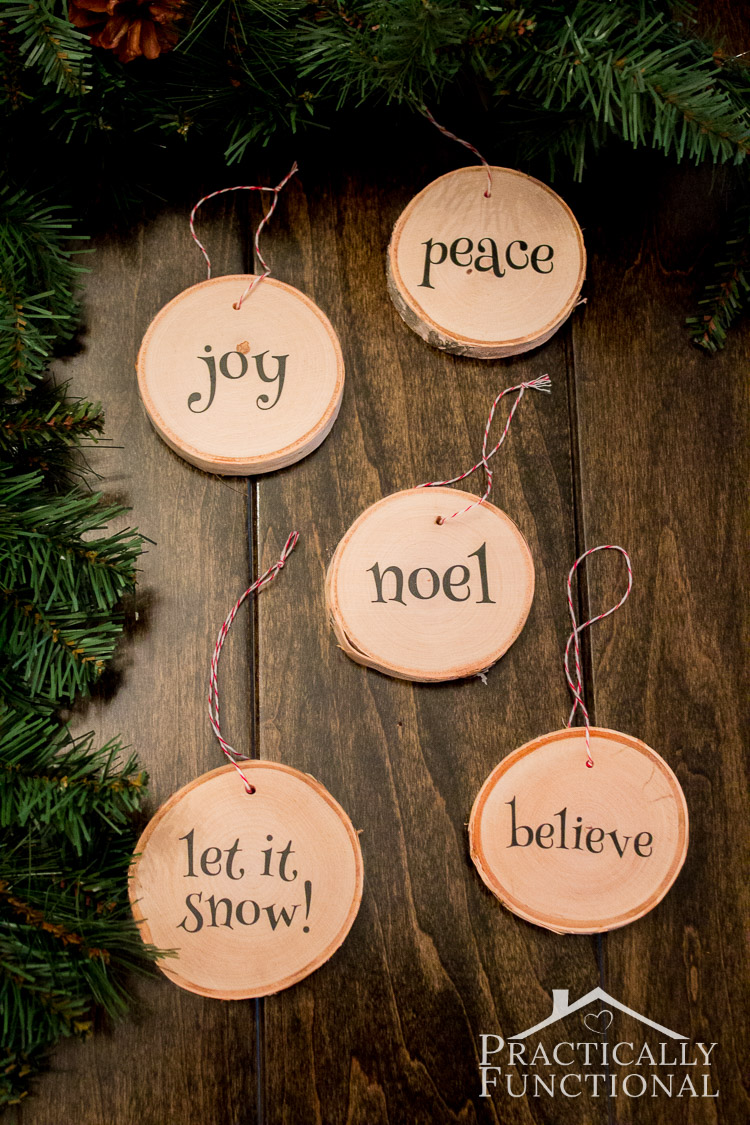
Step 2: Prep the FREE Christmas SVG pattern in Design Space. Next it's time to get your design ready to cut. First, upload the Holiday SVG File into Design Space. With the image highlighted, click on "Ungroup" to separate the images. Then adjust the sizes of the phrases and images to fit your wood slices.
How to Make Easy DIY Wood Slice Ornaments
Handmade wood slice Christmas ornaments make an excellent gift and a fun weekend craft project. From painting to wood burning to metal work to decoupage, here are 5 unique wood ornaments you can make to spread holiday cheer. Filing Cabinet Makeover - From Rusty Hunk to Floral Masterpiece. In this filing cabinet makeover, learn how you can.

DIY Wood Burned Birch Slice Ornaments Dans le Lakehouse
Of course, you could slice up some branches or logs you already have on hand, or even purchase the pre-sliced wood slices. First, Eric sliced the wood using our Ryobi Compound Miter Saw {which is awesome!}. I then lightly sanded the sides with 400 grit paper and inserted eye hooks into the top, which we had leftover from our DIY wedding wands.

10 DIY Wood Slice Ornaments U Create Wood slice ornament, Ornament tutorial, Quilted
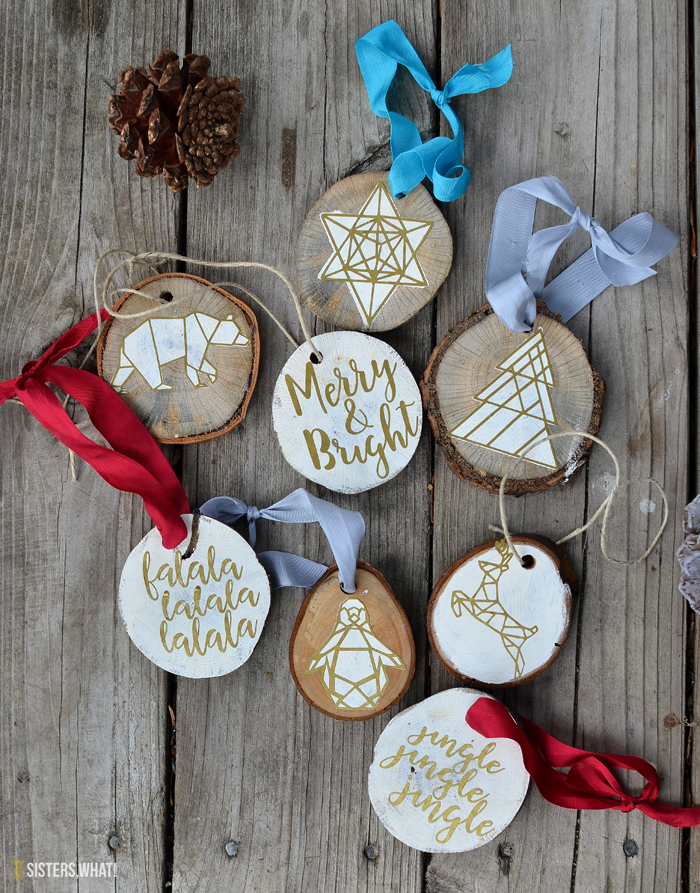
DIY chalkboard wood slice ornaments (via www.brightgreendoor.com) If you are familiar with wood burning or at least want to try it, these cute wood burnt Christmas ornaments are right what you need. Take some wood slices, a wood burning tool and get creative - make snowflakes, Christmas trees, hot chocolate cups, candy canes and so on.
DIY Wood Burned Birch Slice Ornaments Dans le Lakehouse
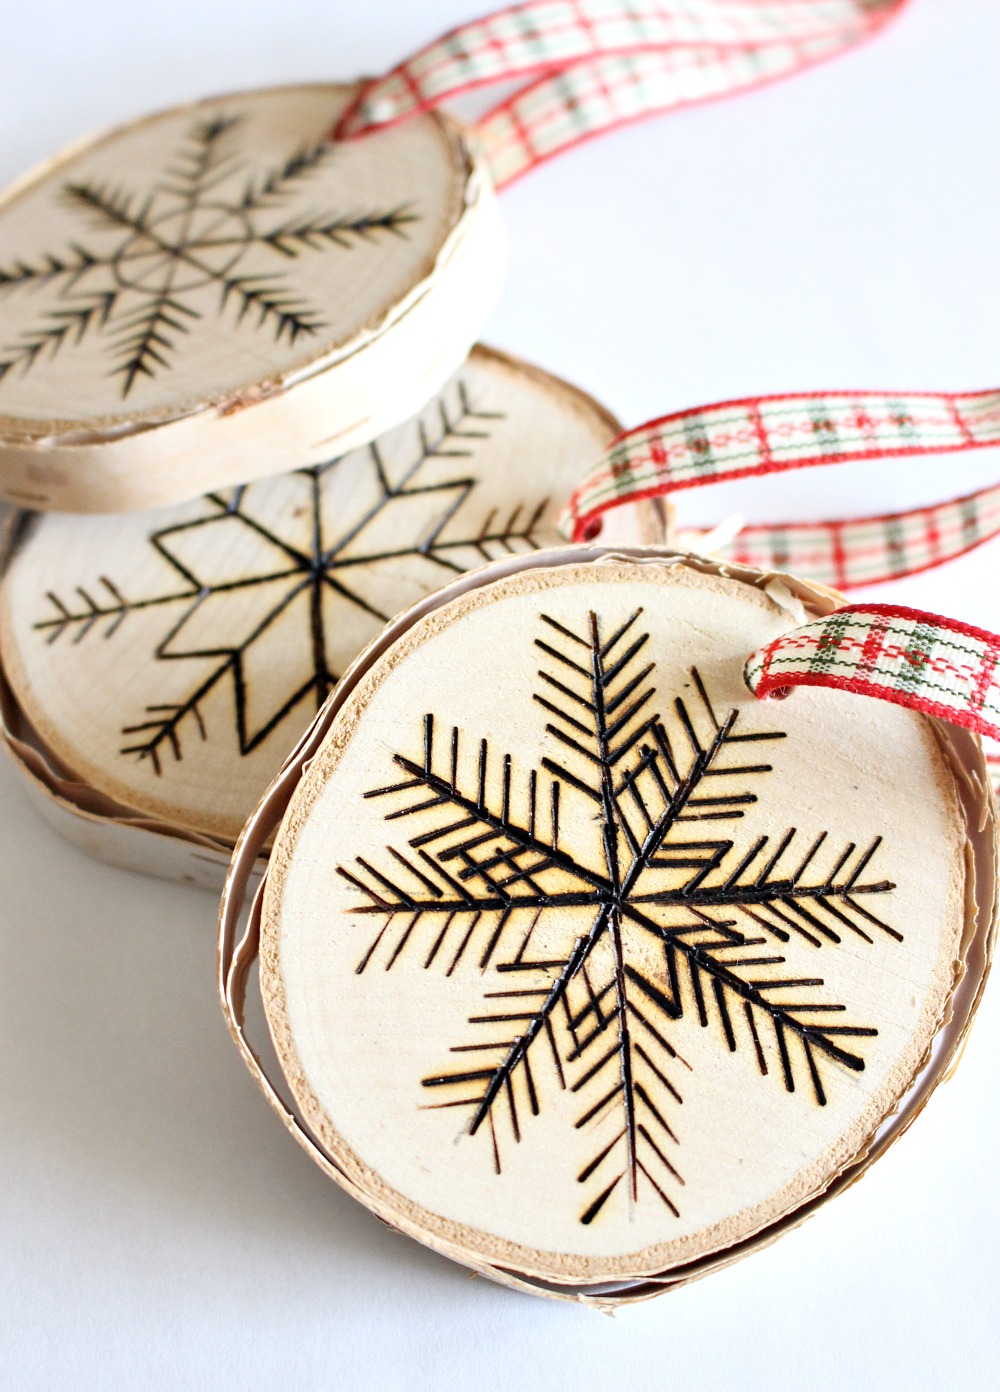
Place the transfer paper, dark side down, onto the wood circle. Tape down, then tape the design on top. Trace the design onto your wood slice using a pen or pencil. Remove the transfer paper and design and heat up the wood burning tool. Follow the lines of the design to burn them into the wood.

Diy Wood Slice Christmas Ornaments
Paint Brush. Hot Glue Gun. Foam Squares. White Cardstock. Photo. Here's how to make your own DIY Wood Slice Ornament: Push your hook into the top of your wood slice and began twisting it. Continue twisting until the screw is all the way in your wood slice. Lay your wood slice on top of your photo and trace around it.

Wood Slice Ornaments the perfect 30 minutes gift idea that your loved ones will enjoy year
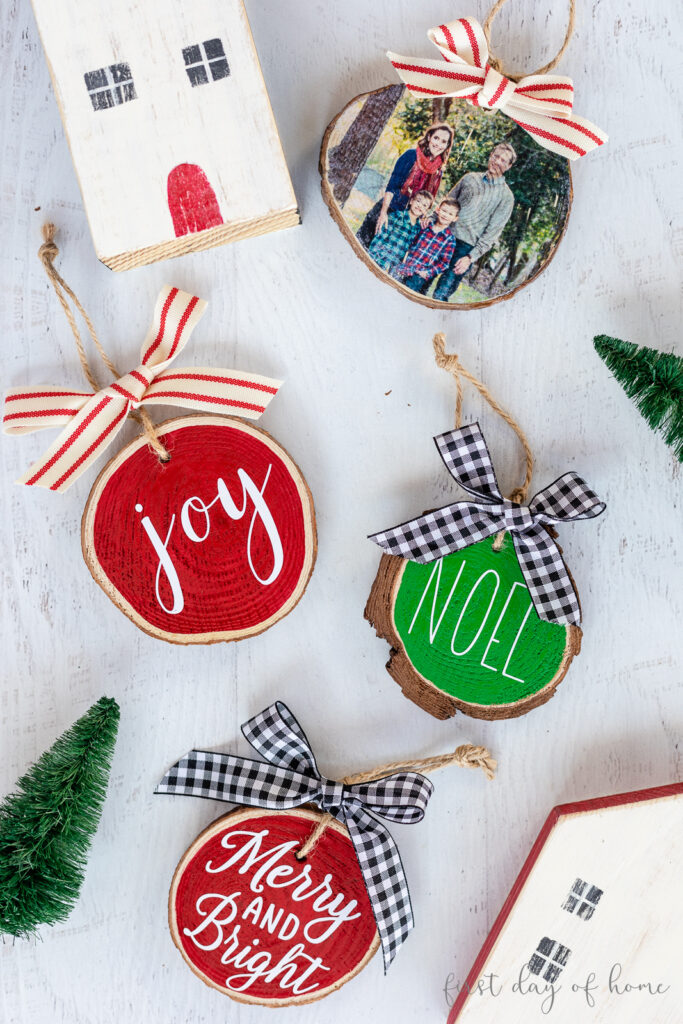
For this wooden ornament, I cut out a circle with fabric and glued it down with mod podge. Once it dried I applied the vinyl decal. Again if you don't have a cutting machine, you could always cut a printed image or saying out and glue that on top with more mod podge. Another option would be to use a wood-burning tool.

DIY Rustic Wood Slice Christmas Ornaments
DIY Wood Slice Ornaments - This collection of wood slice ornament ideas has everything from rustic to glam ornament tutorials. From hand-lettered to Cricut vinyl transfer, and photos to glitter embossed we have rounded up some of THE best DIY ornament projects using wood slices on the web. Scroll down for loads of links you're sure to love!

Hand Painted Ornament Rustic Ornament Tree Wood Slice Etsy Christmas wood, Painted ornaments
DIY Wood Slice Ornaments Using Cameo or Cricut Designs. Last year, my daughter and I decided it would be a fun project to make wood circle ornaments for our teacher's gifts. We used the Cricut design site to find a design we loved and then adhered the vinyl to the wood slices. This project was easy enough for my 10-year-old daughter to do.
Wood Slice Ornaments Made To Be A Momma
Next, take the largest flat 'face' of the pine cone and hot glue it to the center of the wood slice. Press the pine cone into place for about a minute or until it cools into place. If it's not completely even, that is okay! You can fill in any spot or uneven -ness with extra pieces of the pine cone. Allow the hot glue to cool.
DIY Wood Slice Christmas Ornaments
To do this, set your oven to 200°F and place the slices in on a cookie sheet. Leave for 45 minutes, then flip over to the other side. This is an easy, fast method - but you will lose some of the wood to cracking. So make sure you have a lot of slices (you can also embrace the cracks as part of the aesthetic).

Wood slice ornaments Wood christmas ornaments, Christmas crafts diy projects, Christmas signs diy
Avoid branches with knots as these will be harder to cut. Don't cut wet wood as the live bark edge is likely to separate. You can use a hand saw, band saw and chain saw. Sand the wood smooth, especially if cut with a chain saw. Store the wood slices in a cool airy room to dry them. To speed up drying, use an oven or alcohol.