
Gareths Blog How to decode a 433Mhz RF signal (Arduino)
Working Explanation. To Decode and Send 433 MHz RF Signals with Arduino UNO, assemble the circuit according to the schematic. Now, first, you need to open the decoder sketch on IDE. So, for this purpose, go on files. Then go on examples. Go on RC_Switch, and open RecieveDemo_Advanced. Upload that particular code in Arduino.

Decode and Send 433 MHz RF Signals with Arduino Arduino, Decoding, Microcontrollers
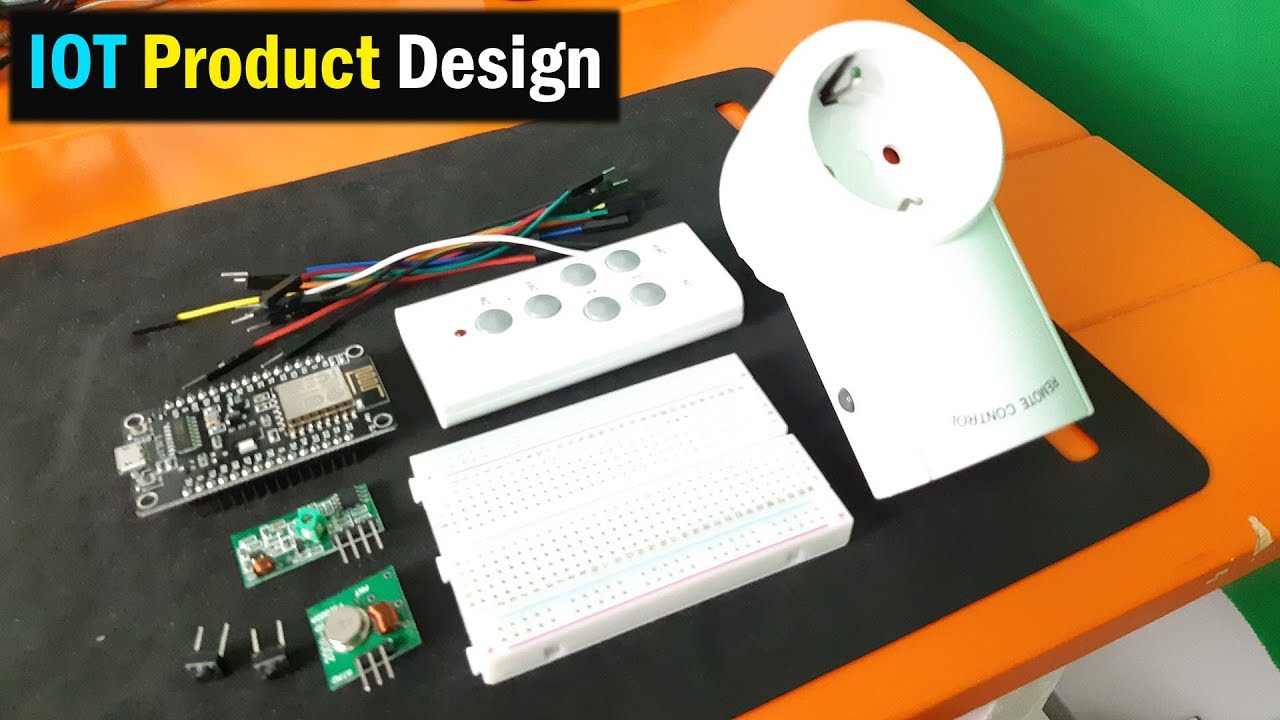
KC868-A4 smart controller, many hardware resources for you to use, you can write any code by Arduino IDE to ESP32 wifi/Bluetooth module. We will supply demo.
Decode 433 MHz signals w/ Raspberry Pi & 433 MHz Receiver PrinceTronics
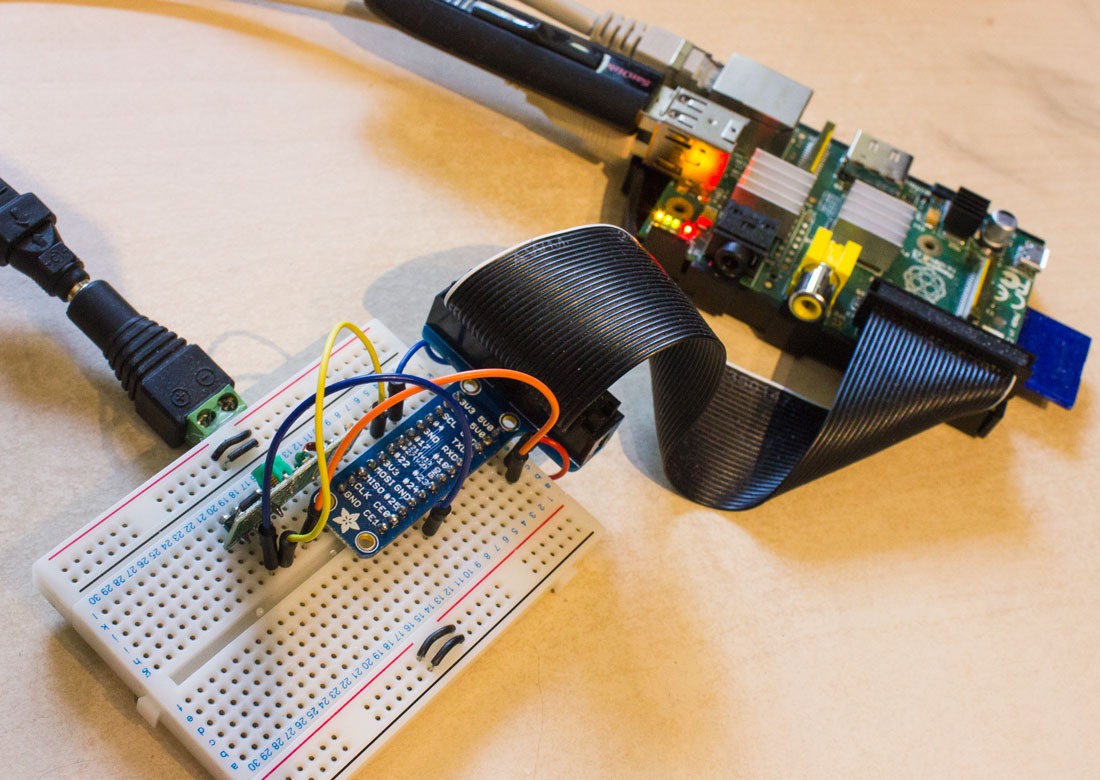
How to decode a 433MHZ signal. I've made the classic 433mhz send/receive experiment, using cheap hardware on the same breadboard and same raspberry, I've wired both sender and receiver to VCC 5V, GND to GND and data to GPIO 27 (receiver) and 17 (sender). I used the 433Utils as software and Piscope to check th result.

How 433MHz RF Module Works & Interfacing with Arduino
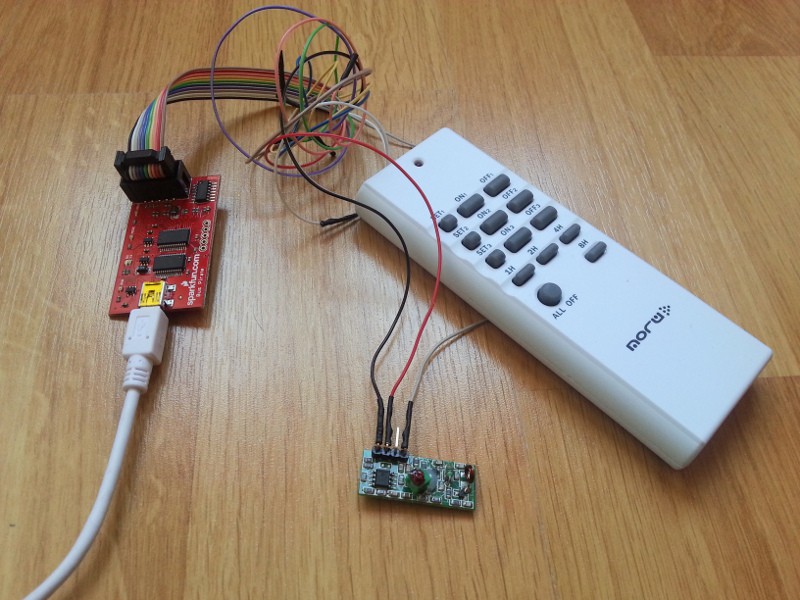
I have three 433mhz remotes that control various things in the house ( a light, a screen motor, and an awning) I tried to decode the signals from these remotes using a 433mhz receiver below: with the rc-switch library I can read the received signal /* Simple example for receiving GitHub - sui77/rc-switch: Arduino lib to operate 433/315Mhz devices like power outlet sockets. */ #include.

Decode and Send 433 MHz RF Signals with Arduino Random Nerd Tutorials
could you help me with code for Arduino to decode the sensor data. I have the same sensor as you but I would like to capture the sensor data with a 433mHz receiver and an Arduino Uno, write sensor data to serial. The receiver I have: 433Mhz RF Transmitter and Receiver Module Kit xy-mk-5v for Arduino Receiver module parameters 1.Product Model.
How to Decode and Send 433 MHz RF Signals with Arduino UNO
The code we will be using to read the 433 MHz RF codes is actually located in the library as example code. To open up the code in the Arduino Software, press the "Open"-button, then press: libraries -> RCSwitch -> ReceiveDemo_Simple. Now the code should appear in the textfield. Now connect your Arduino to your computer and upload the code!

Arduino Tuto 3 How to decode 433MHz RF remote codes ? YouTube
A soundcard makes for a very cheap oscilloscope. The focus of the tutorials is decoding the signals of a Nexa radio-controlled smart plug. [Joonas] first explores using an Arduino to do the job.

Lesson31 How to decode 433MHz RF signal and control device by ESPHome YouTube
Program to decode radio transmissions from devices on the ISM bands (and other frequencies) - GitHub - merbanan/rtl_433: Program to decode radio transmissions from devices on the ISM bands (and other frequencies). signal-processing sdr rtl-sdr sensors rf 433mhz Resources. Readme License. GPL-2.0 license Activity. Stars. 5.5k stars Watchers.

GitHub luispl77/433ScreenSignalHacker Full duplex 433 MHz Signal jammer, recorder, decoder
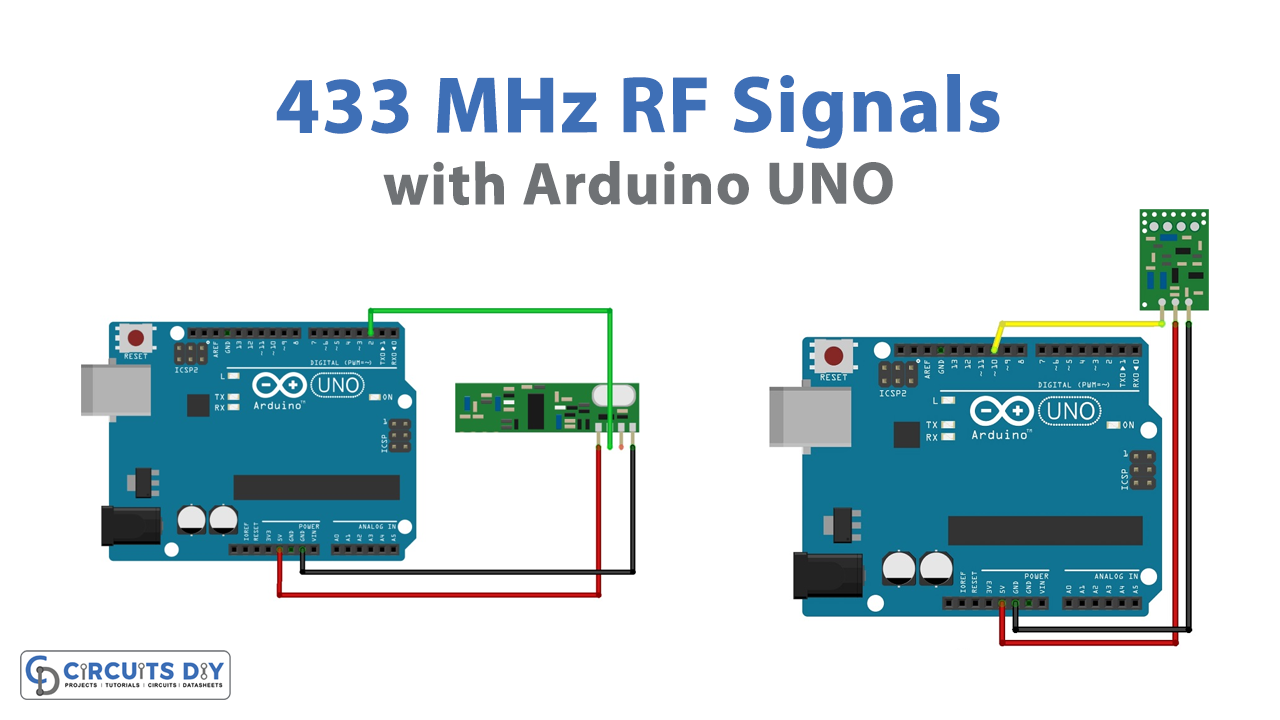
Arduino with RF 433MHz Transmitter/Receiver Modules. In this section, we'll build a simple example that sends a message from an Arduino to another Arduino board using 433 MHz. An Arduino board will be connected to a 433 MHz transmitter and will send the "Hello World!" message. The other Arduino board will be connected to a 433 MHz.

Decode 433 MHz signals w/ Arduino & 433 MHz Receiver PrinceTronics
This guide shows you instructions to use somebody Arduino to decode 433 MHz signals from RF remotes, and send them with with Arduino toward remote-controlled controls some networking switches exit. Miss to content. Menu.. I subsequent the direction and everything uploaded fine, ME can even hear the transmitter send the signal (from get cheap.
ESP8266 กับ 433MHz Receiver Part 1 Decode Signal YouTube
In order to decode that bit pattern, you have to know, or have a very good guess for what data are being transmitted. Here is a general approach for unknown protocols, showing how to decode the signals from 433 MHz weather sensors: Reverse Engineer Wireless Temperature / Humidity / Rain Sensors — Part 1 « RAYSHOBBY.NET.

Decode and Send 433 MHz RF Signals with Arduino Arduino, Arduino radio, Arduino projects
You need to decode the signals that your remote control sends, so that the Arduino or ESP8266 can reproduce those signals and ultimately control the outlets. The library comes with several sketch examples. Within the Arduino IDE software, you need to go to File > Examples > RC_Switch > ReceiveDemo_Advanced. This next sketch opens:

Decoding and sending 433MHz RF codes with Arduino Electronics Infoline Electronics Infoline
There are lots of simple devices broadcasting messages in the air at 433MHz. Things like weather stations, doorbells, remotes, and even car tyre pressure rea.
Decoding 433MHz RF Data From Wireless Switches Tinkerman
Open the rc-switch "ReceiveDemo_Advanced" example sketch. Upload it and open the serial monitor. Hold your remote near your receiver module and press a button. The Arduino should decode the signal and print the results in the serial monitor. This is what I got for my remote-controlled mains switch when I press the button to turn channel 5 on:

How To Decode 433Mhz Low Power Devices Using RTL433 And A RTLSDR Receiver YouTube
Over on his YouTube channel Tech Minds has recently uploaded a video that demonstrates and shows how to use the rtl_433 software with an RTL-SDR to decode 433 MHz ISM band low power devices. Typically these devices include things like home wireless temperature and weather sensors, tire pressure sensors, remote controls, and other various sensors.In the video he sets up an RTL-SDR and magmount.

ArduinoBasics 433MHz RF Tutorial 2 YouTube
Free Shipping Available. Buy 433mhz Decoder on ebay. Money Back Guarantee!