GitHub itsharryle/LED_CUBE 8x8x8 LED cube powered by an arduino
Each layer is made up of 8×8 LED Matrix consisting of 64 LEDs. In order to build the layers, take a Sunboard and make holes at a distance of 2.5CM. Place the LEDs and start soldering all the cathodes together. In order to increase the strength of the layer, solder few connecting wires between LEDs.

Arduino Mega 8x8x8 RGB LED Cube 11 Steps (with Pictures) Instructables
Adafruit DotStar High Density 8x8 Grid - 64 RGB LED Pixel Matrix. Product ID: 3444. Add to Cart. $24.95. 26 in stock.

How to make 8x8x8 LED cube using arduino YouTube
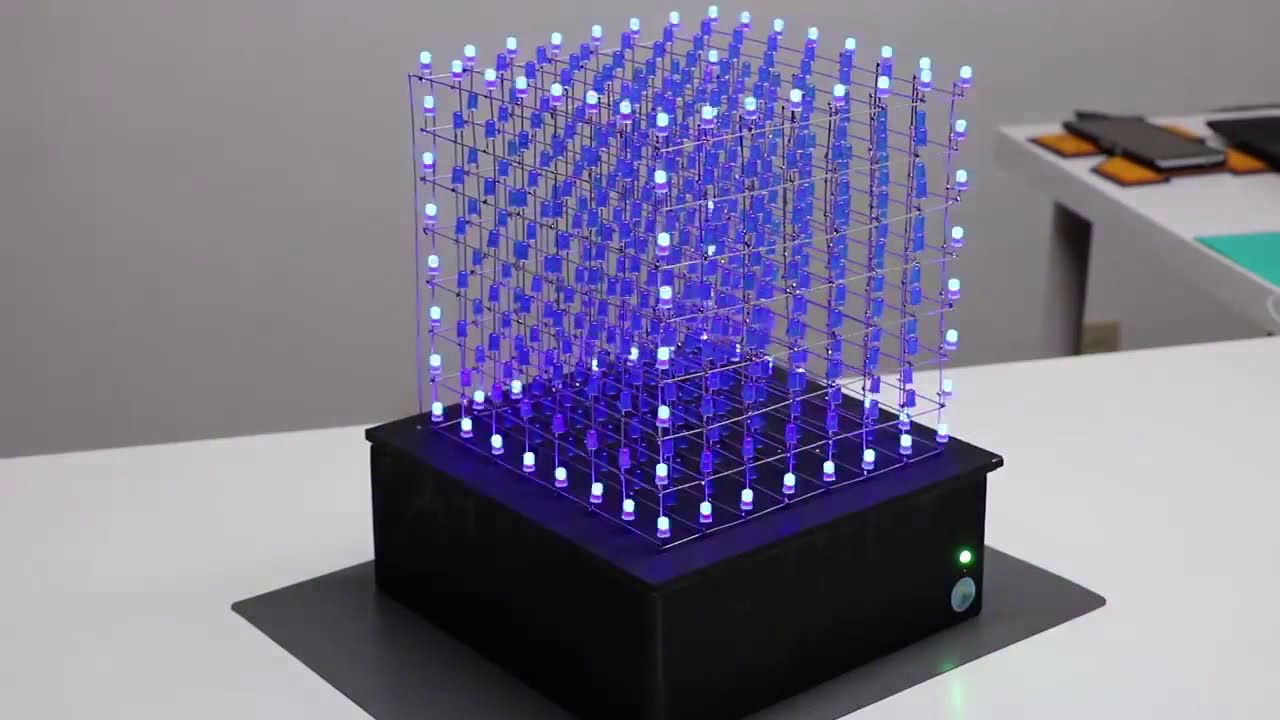
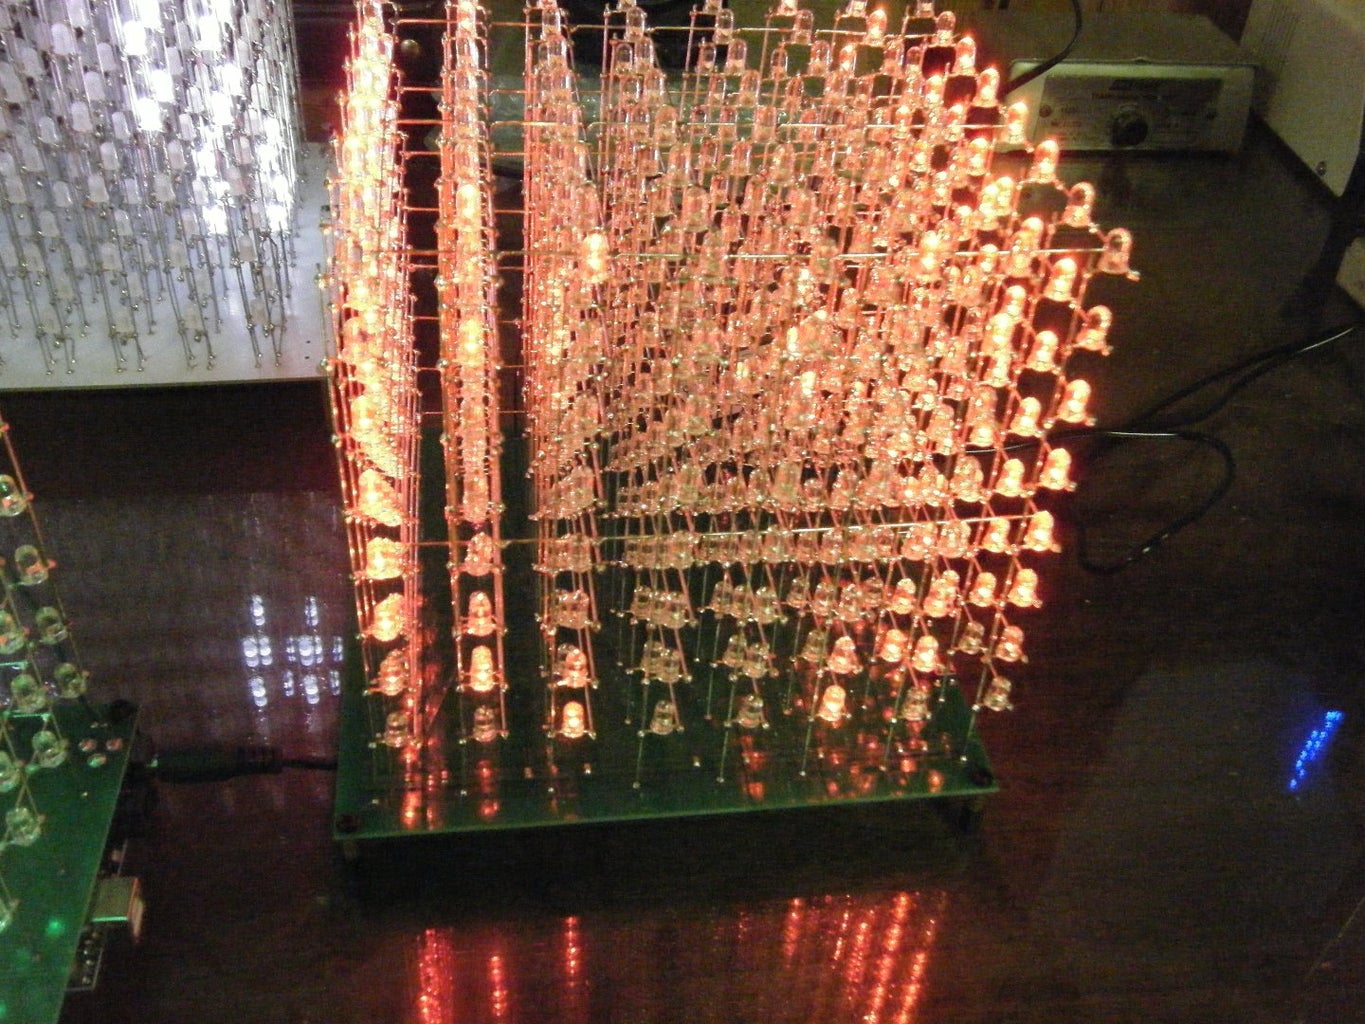
The final build of the 8x8x8 LED Cube is shown in the image below. The structure is very strong and all the electronics including the power supply are concealed inside the base. Circuit Diagram. The following image shows the complete circuit diagram of the 8x8x8 LED Cube using Arduino Nano.

Arduino DIY 8x8x8 LED Cube 3D Light Square Electronic Soldering Sarter Kit Board (Blue Led
Please bare with me if this seems like a stupid quest ive looked around the forum but cant find answers to the questions im looking for. Im building an 8x8x8 LED cube but need to know if the arduino can connect to the 64 LED columns to switch each of the LED lines. Multiplex to allow me to isolate one LED and make animations exc. any kind of information would be very helpful as im ripping my.
8x8x8 LED CUBE WITH ARDUINO UNO TECH VIRUS 2019 YouTube
Step 5: Building the Layers. Next step is to create the layers. Each layer is made up of 8×8 LED Matrix consisting of 64 LEDs. In order to build the layers, take a Sunboard and make holes at a distance of 2.5CM. Place the LEDs and start soldering all the cathodes together. Create an 8x8x8 template so you can create the layers.
8x8x8 LED CUBE WITH ARDUINO UNO ! YouTube
Step 2: How to Build the Layers. Next step is to create the layers. Each layer is made up of 8×8 LED. Build the layers correctly, draw a net like in the picture (2,5cm between the holes) and take a piece of wood and make holes based on the drawing. Place the LEDs and start soldering all the cathodes together (bend the legs of the cathodes into.

8 x 8 x 8 LED Cube Powered by an Arduino Mega Arduino Project Hub
Source code and schematic can be found on my GitHubhttps://github.com/itsharryle/LED_CUBEPART LIST:5mm diffused blue LEDs x 51220 AWG tinned copper wire5V 10.
8x8x8 RGB LED Cube Arduino Project Hub
Once it is installed, we need to add the user "pi" to the correct group to send data to the Arduino. So to add pi to the group, open a terminal and type the following : $ sudo usermod -a -G.

How to make 8x8x8 Led Cube Arduino Project Hub
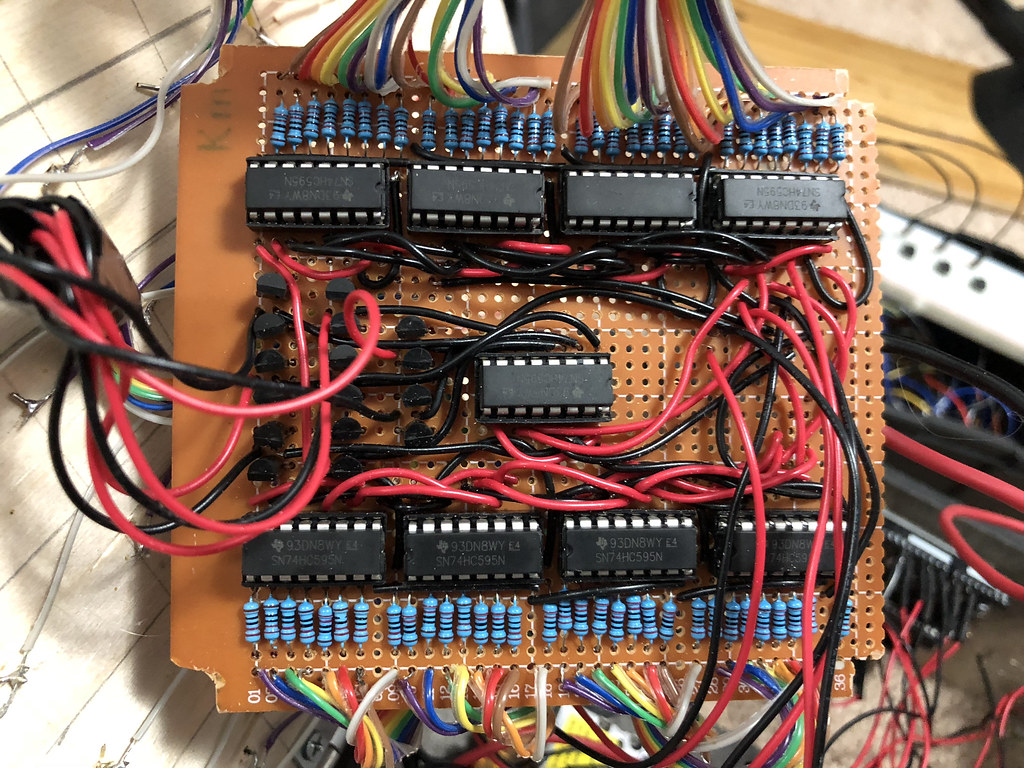
All parts you'll need to build the cube: 1 Arduino/Freeduino with Atmega168 or higher chip 512 LEDs, size and color are up to you, I used 3mm red 4 A6276EA LED driver chips from Allegro 8 NPN transistors to control the voltage flow, I used the BDX53B Darlington transistor 4 1000 ohm resistors, 1/4 watt or higher 12 560 ohm resistors, 1/4 watt or higher 1 330uF electrolytic capacitor 4 24 pin.

Arduino DIY 8x8x8 LED Cube 3D Light Square Electronic Soldering Sarter Kit Board (Blue Led
In the frame functions (e.g. box, box2, box3) of your example, the bits that are set to "1" in the frame buffer (i.e. the cube array variable) are the LEDs that are on in that frame, and those that are set to "0" are off in that frame. Each layer has 8 LEDs, so there is one bit per LED. You just have to map out and your LED pattern per frame.

DIY 8x8x8 LED Cube using Arduino Nano مكعب LEDs باستخدام اردوينو نانو YouTube
1948. 9. I bought this kit a while ago when I was looking at building an Arduino based 8x8x8 LED cube. This one was listed on Amazon as Arduino compatible, meaning that I should be able to re-program it using the Arduino IDE after assembling it to display what I want. The kit was delivered quite quickly, but there was one pretty obvious thing.

8X8X8 Led Cube Arduino 8x8x8 Infinite RGB LED Cube Rowland Technology Contribute to
A bit of electrical tape around the open leads to stop any shorts and marked up the positive (anode) wire from the LED. Connect up your processor (in my case an Arduino mega) to the board with the 6 connectors. Connect up power to the board from the power supply. Connect the Anode test lead to a 5v source on the board.
8 x 8 x 8 LED Cube Powered by an Arduino Mega Arduino Project Hub
Looking for Arduino Led Module? We have almost everything on eBay. But did you check eBay? Check Out Arduino Led Module on eBay.
8x8x8 Arduino LED Cube 14 Steps (with Pictures) Instructables
How to make 8X8X8 RGB LED cube using Arduino project files: https://github.com/anoopmm/8x8x8_RGB_LED_CUBEi referred kevindarahs project for this cube https:/.
GitHub itsharryle/LED_CUBE 8x8x8 LED cube powered by an arduino
For the anode side of the cube, you'll need x^2 IO ports, where x^3 is the size of your LED cube. For an 8x8x8 (x=8), you need 64 IO ports to drive the LED anodes. (8×8). You also need 8 IO ports to drive the cathodes. Keep in mind that the number of IO ports will increase exponentially. So will the number of LEDs.

Arduino 8x8x8 LED Cube Animations YouTube
Row-column Scanning to control an 8x8 LED Matrix. LED displays are often packaged as matrixes of LEDs arranged in rows of common anodes and columns of common cathodes, or the reverse. Here's a typical example, and its schematic: These can be very useful displays. To control a matrix, you connect both its rows and columns to your microcontroller.