Accurate Clock Just Using an Arduino Arduino Project Hub
Step 1: Parts For this Instructable, you will need: 1 Arduino (I used an Arduino-nano) 1 LTC-617 clock display (you might need to solder male headers onto it) many jumper wires 1 button 1 resistor: 10k or close (to prevent short between gnd and 5v on button press) For me this was a no-cost project as I already had all the parts.
Intuitive Arduino clock has seven alarms and three LED displays Arduino Blog
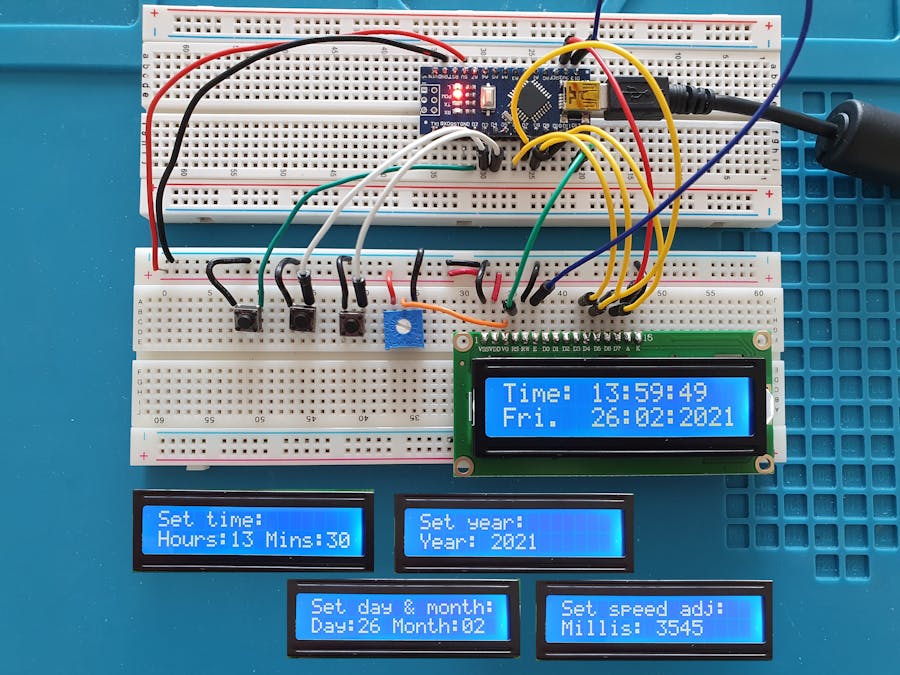
1 // Paul Brace Feb 2021 2 // Script to accept millis() from Arduino 3 // 4 and compare it to internal millis to 5 // assess inaccuracy of the Arduino clock. 6 // 7 Assumes that the computer clock is accurate 8 // -ve = Arduino is running slow 9 so enter as a + ve adjustment in the clock program 10 // +ve = Arduino is running 11 fast so enter.

Arduino for Beginners Digital Clock with 7segments LED and RTC (Realtime Clock)
Real-Time Clock (RTC) - A Real-Time Clock, or RTC for short, is an integrated circuit that keeps track of time. It uses a back-up battery to maintain the time in the event that the main power source is removed. Global Positioning Device (GPS) - A GPS device communicates with satellites to determine its location anywhere in the world.

Simplest Arduino Clock With 7digit segment display Slawomir Jasinski Arduino, Clock
Much like very cheap alarm clocks: every time they lose power they blink 12:00 While this sort of basic timekeeping is OK for some projects, a data-logger will need to have consistent timekeeping that doesnt reset when the Arduino battery dies or is reprogrammed. Thus, we include a separate RTC!
How to Use a Realtime Clock Module with the Arduino Circuit Basics
In this tutorial, we are going to learn how to make OLED clock by: Reading time (hour, minute, second) from DS3231 RTC module and display it on an OLED Reading time (hour, minute, second) from DS1307 RTC module and display it on an OLED You can choose one of two RTC modules: DS3231 and DS1307. See DS3231 vs DS1307 Hardware Required

Arduino Real Time Clock (DS1307) 7 Steps Instructables
Set the current time in the Real Time Clock. For setting the current time you need to change the code provided. set your current time int the function setDS3231time () The parameters for the function are highlighted in red: seconds, minutes, hours, day of the week, date, month and year (in this order). Sunday is the day 1 of the week and.

Arduino alarm clock project
The micros function, like the millis function, except it measures the time the Arduino has been running in microseconds. You can use the above functions to insert time delays or measure elapsed time. But you can't get the time of day or date from them. To do that you'll need to add an external component - a "real time clock". Real.
Arduino Nano Clock with 4x64 LED Matrix (new version) Arduino Project Hub
In this Arduino Tutorial we will learn how to use the DS3231 Real Time Clock Module. You can watch the following video or read the written tutorial below. Overview The first question that comes here is why we actually need a separate RTC for our Arduino Project when the Arduino itself has built-in timekeeper.

Easy Arduino LED Clock Johannes' Blog
In this video i will show you how to make a large seven segment clock using arduino , project is simple and interesting and quite useful too, How to Make A S.

Arduino Clock Instructables
Code explanation. The first, includes the I2C library and the RTC library. Next, create an object called "lcd" for the I2C library and add the I2C address and the length and width of the LCD we are using. Then create an object called "rtc" for the RTC library and insert the I2C communication pin into it.

Counting time with Arduino (without RTC) · One Transistor
This tutorial will describe how to use 20 x 4 LCD display with Arduino to print a real-time clock and date. 20 x 4 Character LCD Display Module This liquid crystal display has 4 lines, 20 character in each line and cannot be used to display graphics.

Arduino Timer With On/Off Set Point 6 Steps (with Pictures) Instructables
The simplest Arduino LCD clock ever designed. Only needs an Arduino UNO, a 1602 LCD, and two buttons. No resistors, no potentiometer. Nov 18, 2018 • 196454 views • 128 respects clock precision simplest Components and supplies 1 Solderless Breadboard Half Size 1 Jumper wires (generic) 2 Pushbutton switch 12mm 1 Arduino UNO 1
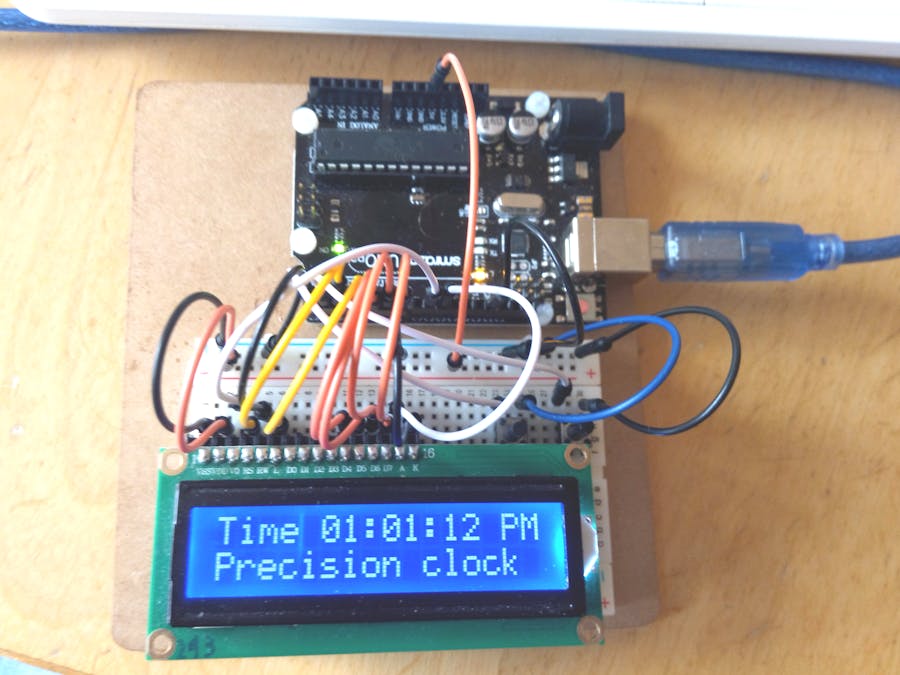
Simplest UNO Digital Clock Ever Arduino Project Hub
Step 1: Connectivity Let's connect the components to Arduino first. We connect: VCC and ground of both OLED and RTC modules to VCC and GND of Arduino SCL and SDA pins of OLED display to pins A5 & A4 on Arduino CLK DAT RST pins of the RTC to Arduino pins A1 A2 and A3 Ask Question Step 2: Clock Dial Design

New Guide Build An Arduino GPS Clock « Adafruit Industries Makers, hackers, artists
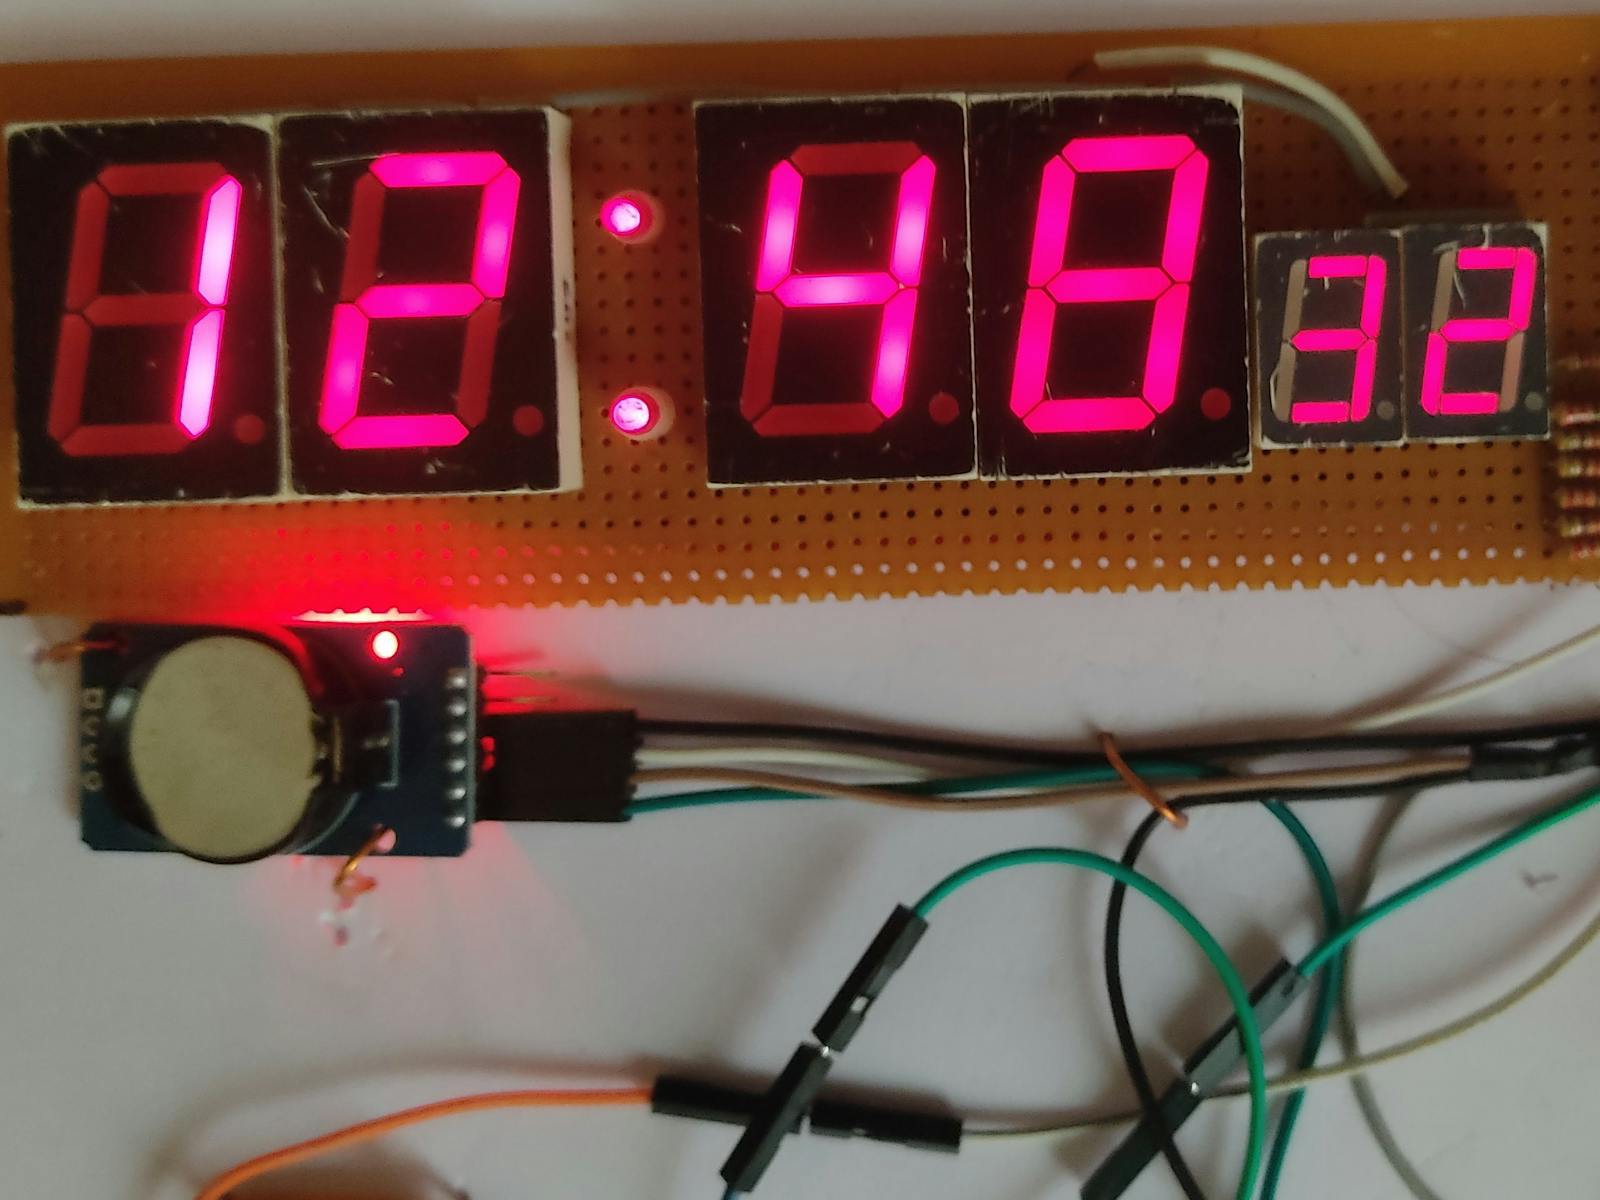
In this tutorial, we are going to learn how to make 7-segment clock using Arduino. In detail, we will learn two cases: Arduino reads time ( minute and second) from DS3231 RTC module and display it on the TM1637 4-digit 7-segment module Arduino reads time ( hour and minute) from DS3231 RTC module and display it on the TM1637 4-digit 7-segment module

Arduino Clock With DS3231 and LCD1602 3 Steps Instructables
The clock's electronics are created from 132 LEDs, an Arduino, and Real Time Clock breakout board. The clock also has roughly 6 feet of PVC tube, and 2 feet of ABS tube to form the "hands" for the clock, all mounted on a sheet of plywood painted black (in my case).
Digital Clock using Arduino Nano Hackster.io
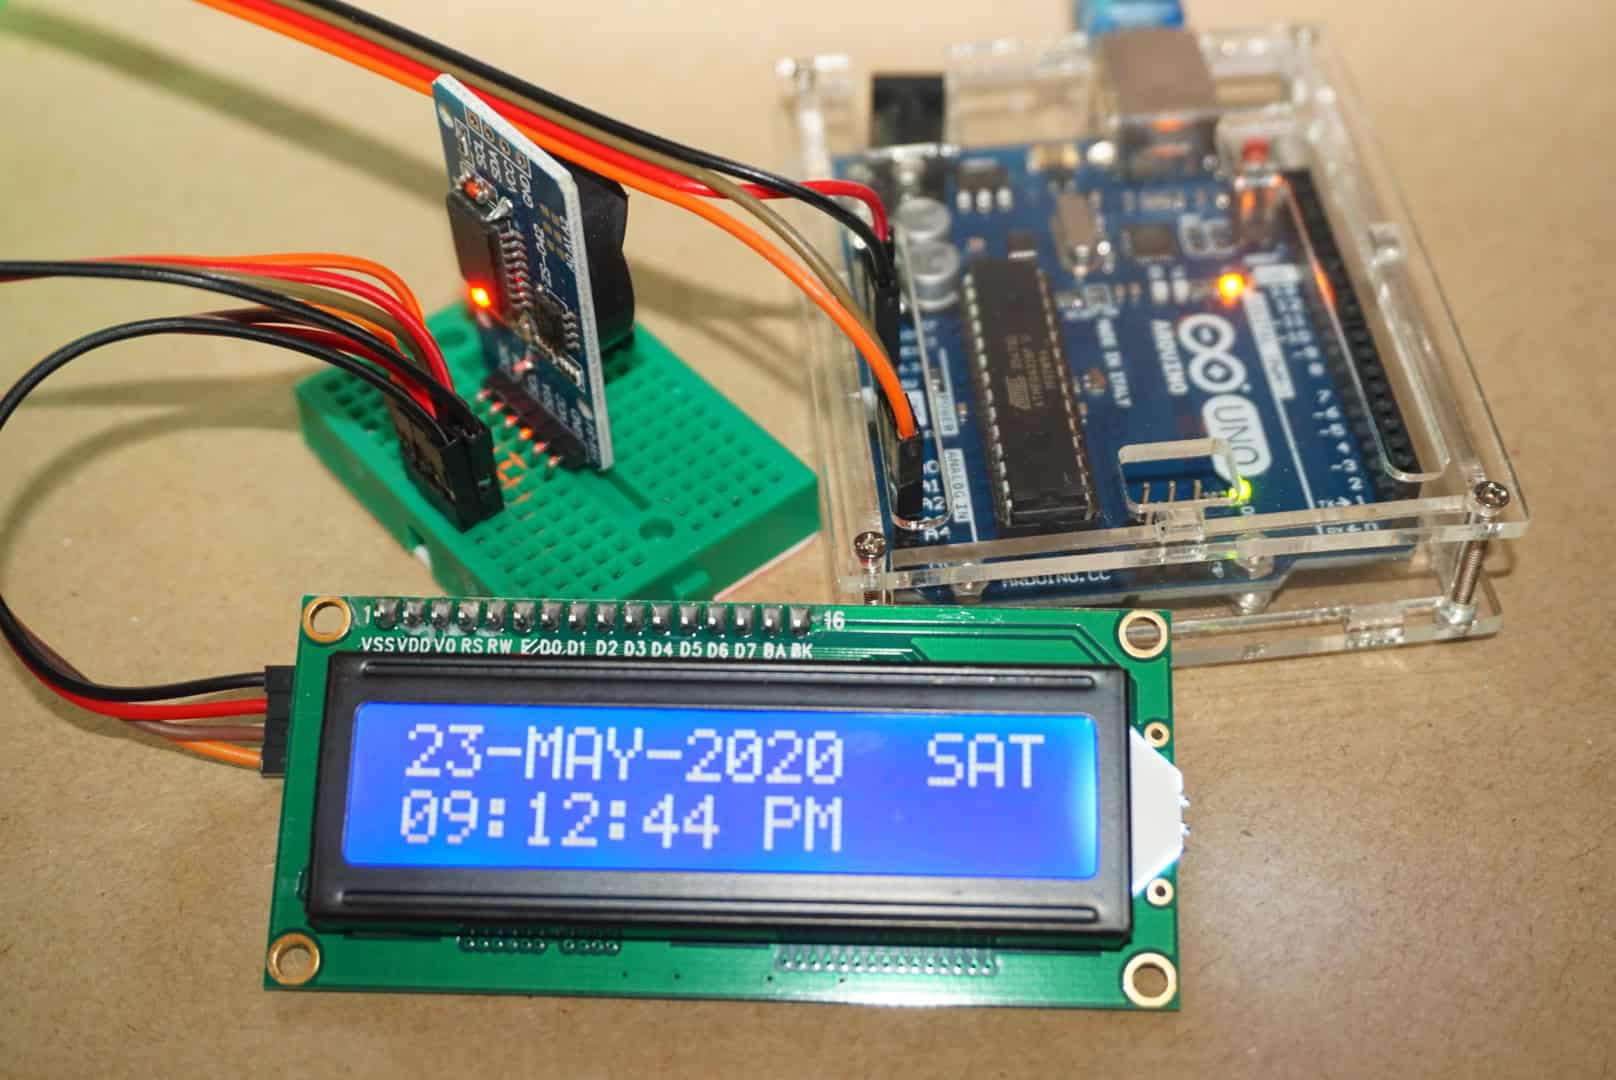
In this tutorial, we are going to learn how to make LCD clock by: Reading date and time from DS3231 RTC module and display it on an LCD I2C 16x2 Reading date and time from DS1307 RTC module and display it on an LCD I2C 16x2 You can choose one of two RTC modules: DS3231 and DS1307. See DS3231 vs DS1307 Hardware Required