10 Realistic Flower Drawings Step by Step Easy Drawing Tutorials
Step 9 - Now, Draw a Leaf on the Right Side. In this step, we will be adding a single leaf on the right side of the stem of the rose. Create the leaf by drawing an irregular shape with a round edge on the left side and a pointed end on the opposite side. This forms the shape of a single leaf. Afterwards, draw a slightly curved line across the.
How To Draw A Rose Easy StepbyStep Guide
Step 1. Begin by drawing three small circles, each one a little larger than the last. Then draw the first inner petal with a pointer end. This just takes two rounded or curved lines around the three circles joined at the top in a V shape. This will be the center of the rose.

How To Draw Rose Pictures Rose Step by Step Drawing Lessons
STORE: https://titatuart.com/In this tutorial, I'll show you how to draw a realistic rose step by step.🔔 SUBSCRIBE for more FREE drawing tutorials: https:/.

How To Draw A Realistic Rose For Beginners Step By Step / It is a good idea to start with a
How to Draw a Rose Step-by-Step Step 10: Start drawing the petals. Now that we know how to draw rose petals, we are going to start drawing our roses. Remember that the petals on the base are broader and flatter than the ones in the center. Please start with the first petal and draw the rest overlapping them. Step 11: Draw the second layer of petals

How To Draw Rose Pictures Rose Step by Step Drawing Lessons
Today, Hadley and I are learning how to draw a rose! This drawing is perfect for Valentine's Day and Mother's Day! Art Supplies ~ This is a list of the suppl.

How to draw a rose step by step Roses drawing, Rose drawing, Flower drawing
Step 6: Shade your rose. Start to add shadows by adding light lines as shown in the picture below. This will make your petals appear more three-dimensional. Next, you'll want to soften those lines by using a blending technique. When blending, use your finger, or if you prefer, a blending pencil, tissue, or paintbrush can also work.
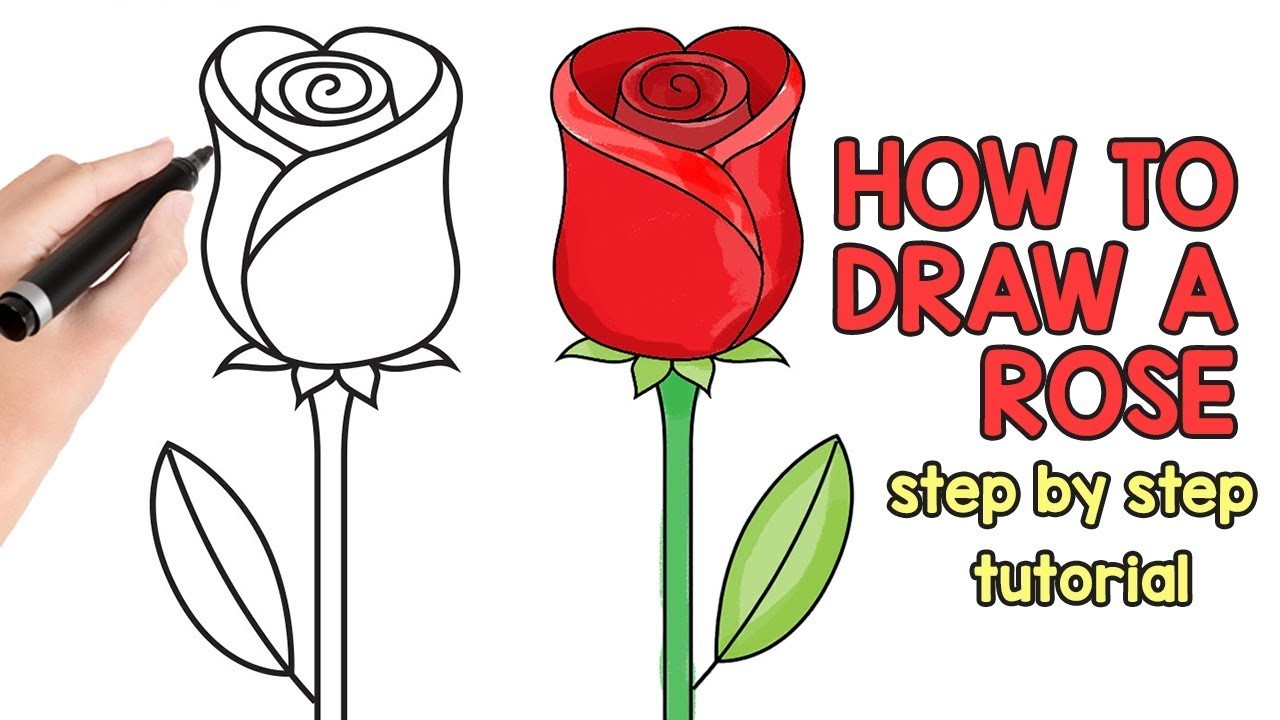
How to Draw a Rose Easy Step by Step For Beginners and Kids Easy Peasy and Fun
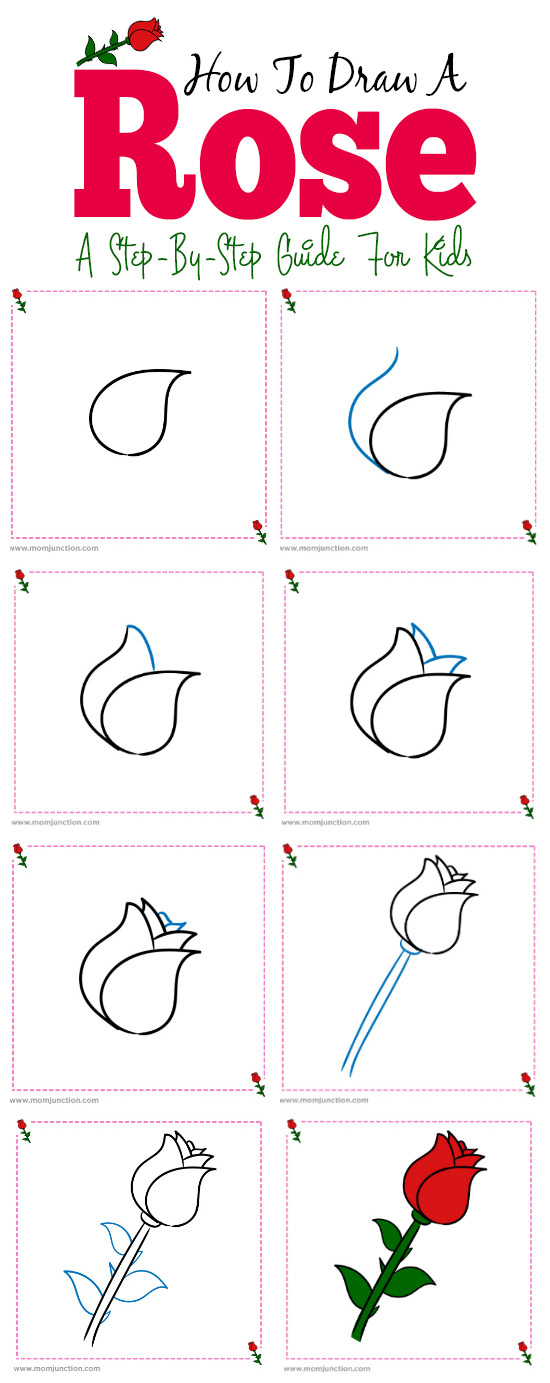
Step 3 - Draw an elliptical shape over the right petal, representing the petals behind the front ones. Step 4 - Repeat the elliptical shape over the left petal. Step 5 - Add sepals at the base and extend a stem. Step 6 - Draw a slightly curved line extending on either side of the stem.
How To Draw A Realistic Rose For Beginners Step By Step / It is a good idea to start with a
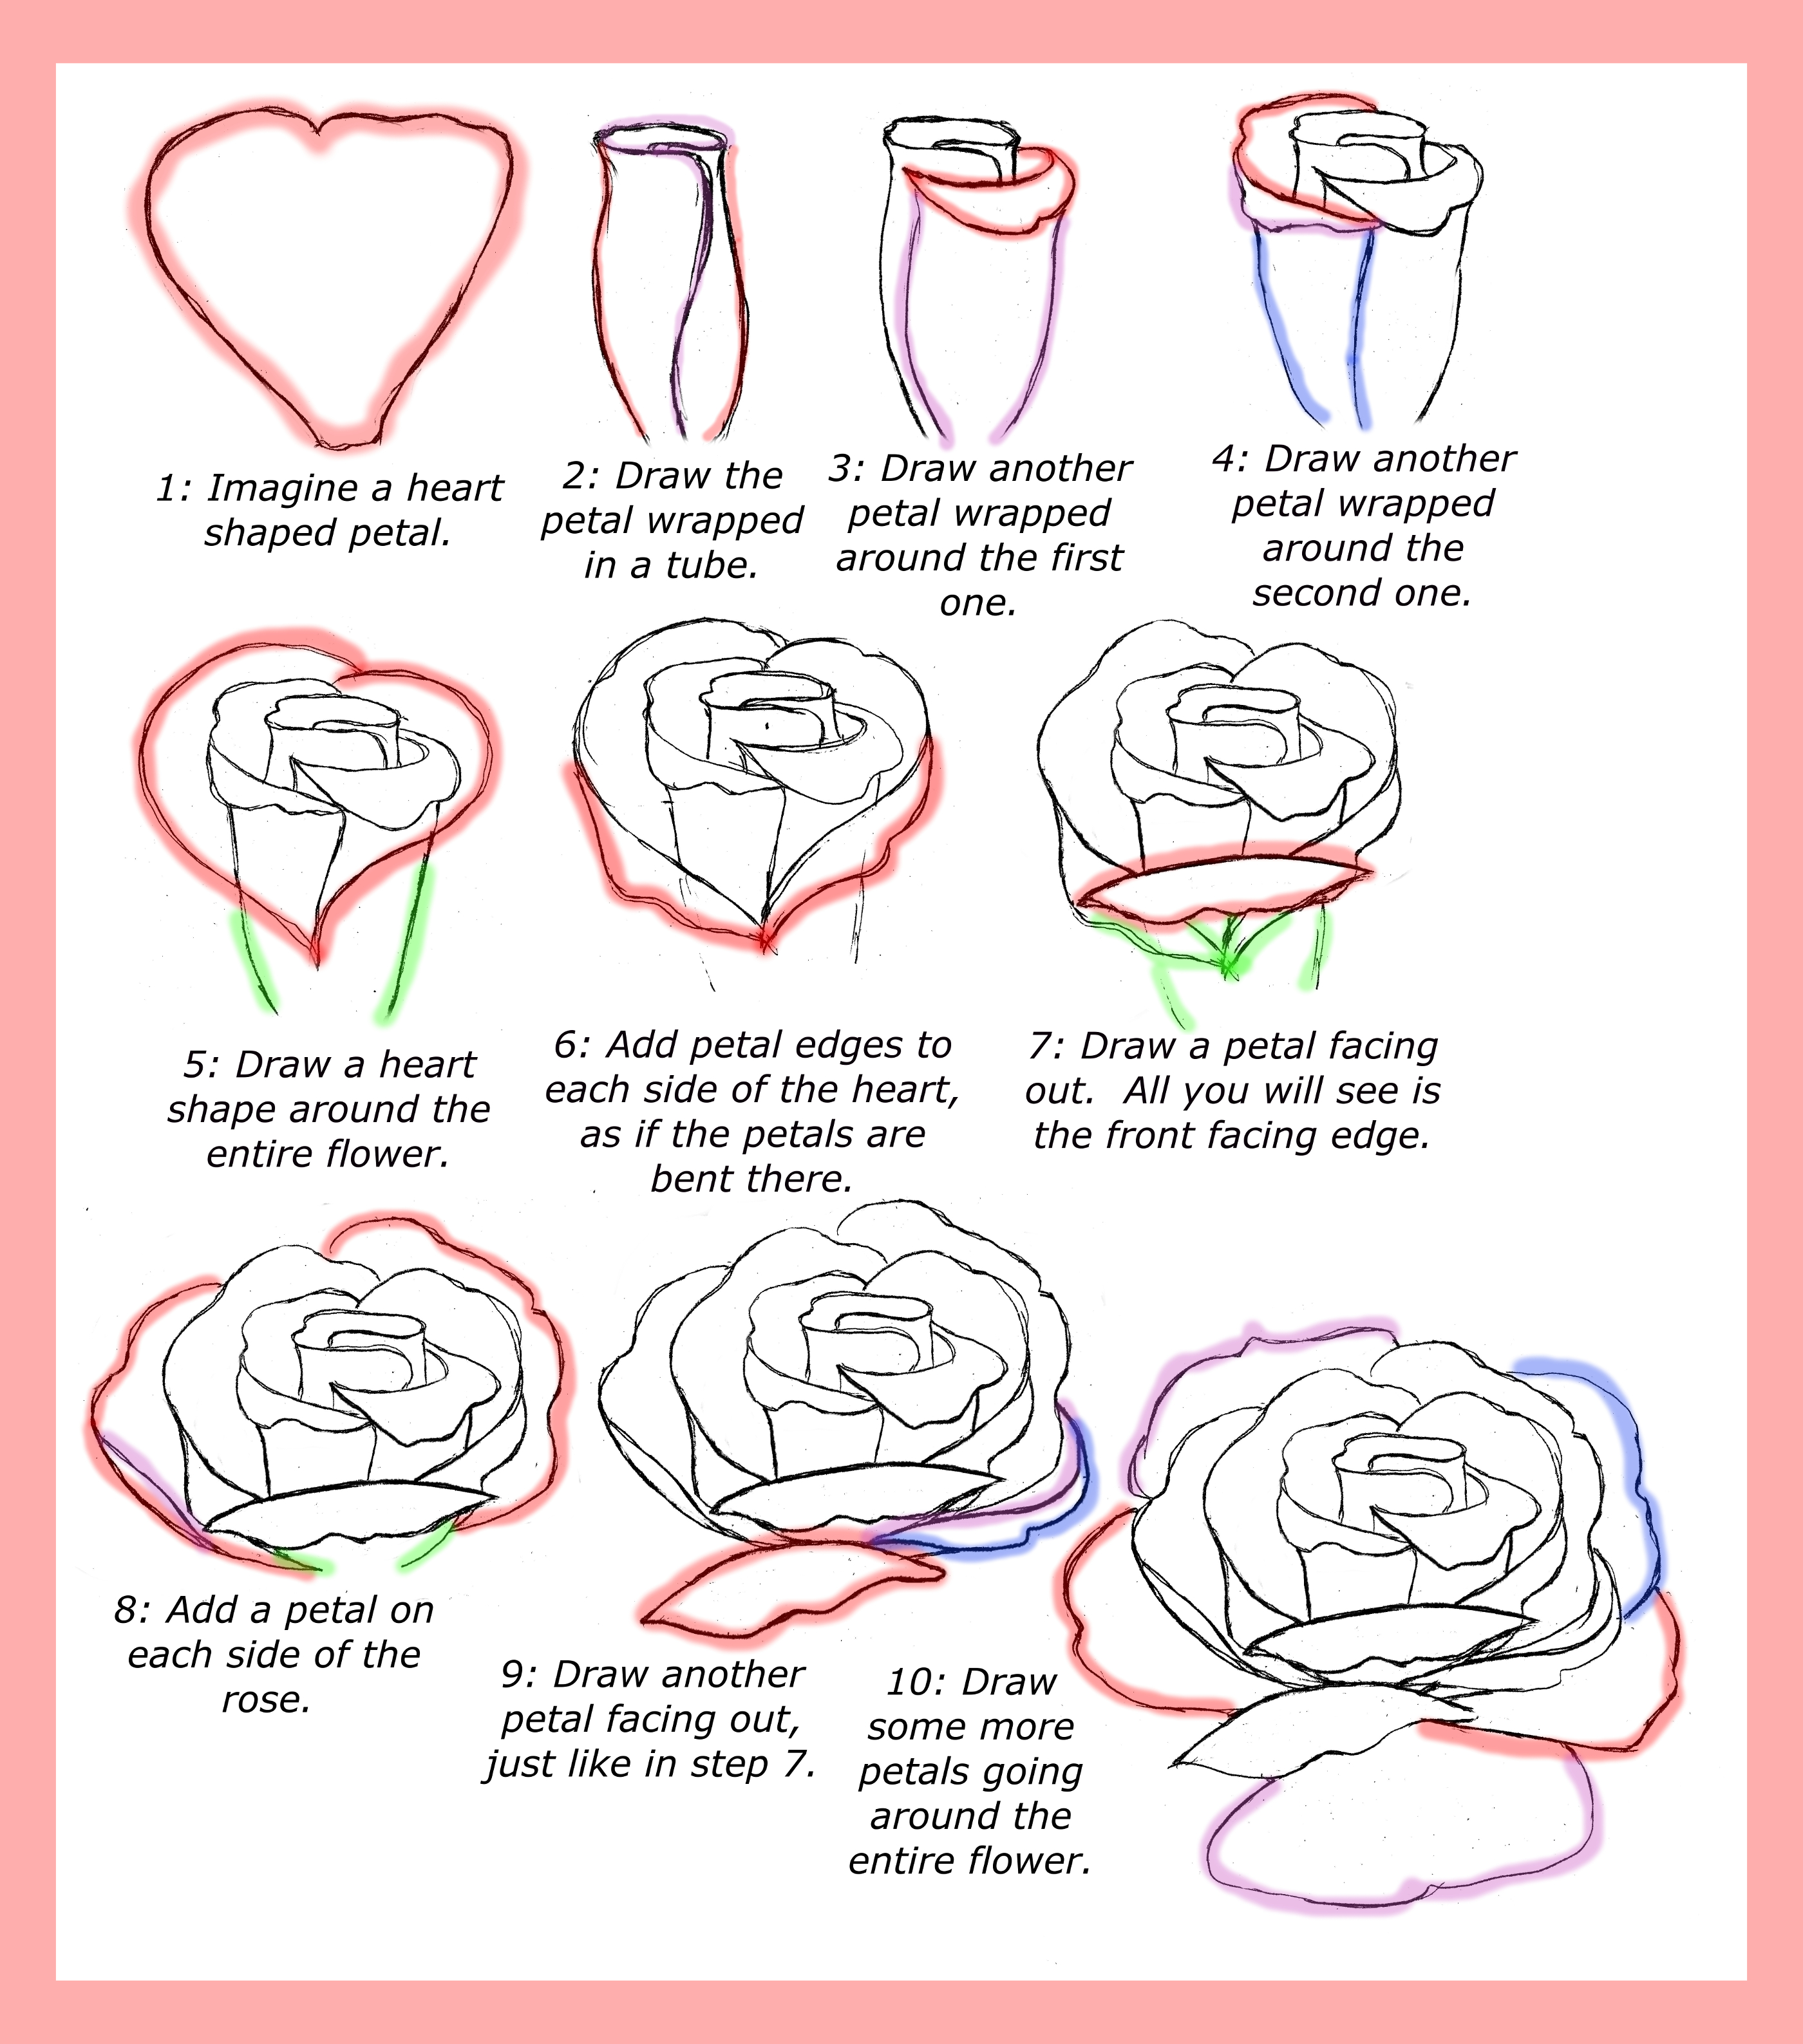
Step 1 - Roughly Sketch the Parts of a Rose. First, sketch a small oval-shaped swirl. This step is red in the following image. Next, sketch a heart connected to the swirl. The swirl should be in the middle of the heart where you would normally find the indent of the heart. This step is green in the following image.
Marigold Flower Drawing Step By Step / This will be the bud of your lotus flower. Drawhit
Step 1 — What Pencil to Choose & A Light Touch. It is a good idea to start with a light pencil such as a 2H or 3H. A dull pencil works best, as it glides across the paper more easily when sketching out basic shapes. Keep your movements fluid and loose throughout this process. After all, a rose is a living thing, and maintaining that idea will.
How To Draw A Rose With Pencil Easy
Step 3. Draw a heart around the spiral - start at the top with the heart cleft touching the oval shape. Again don't worry about the shape of the heart, the left and right sides don't have to look the same. Other parts of the heart don't need to touch the oval shape, but there is nothing wrong if they do.

September 2014 Learn To Draw And Paint
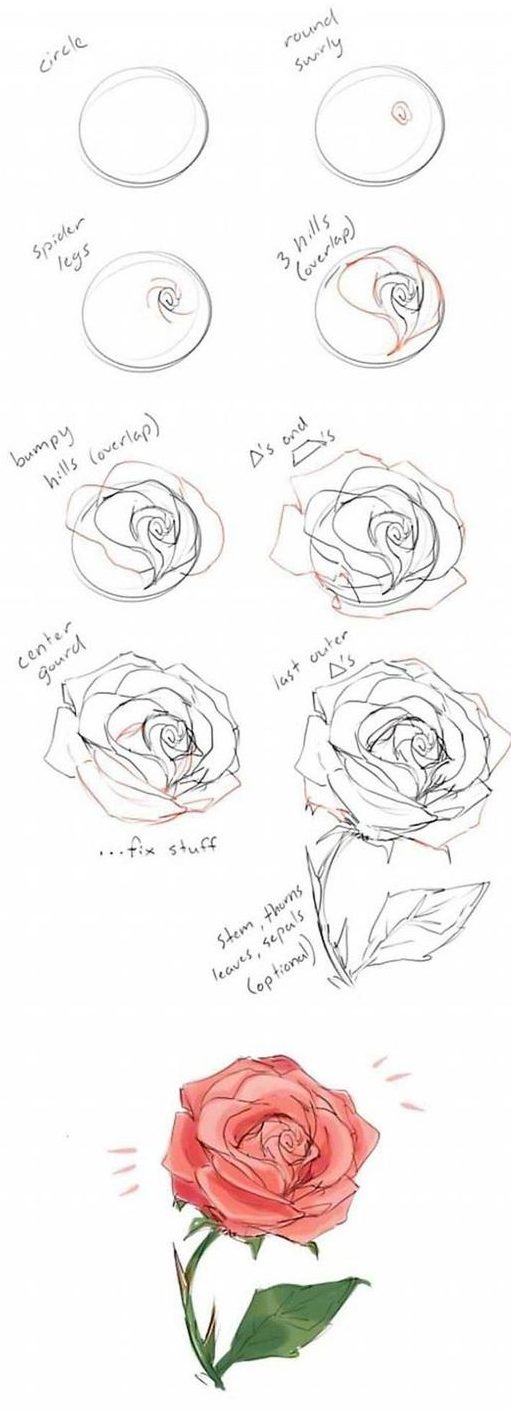
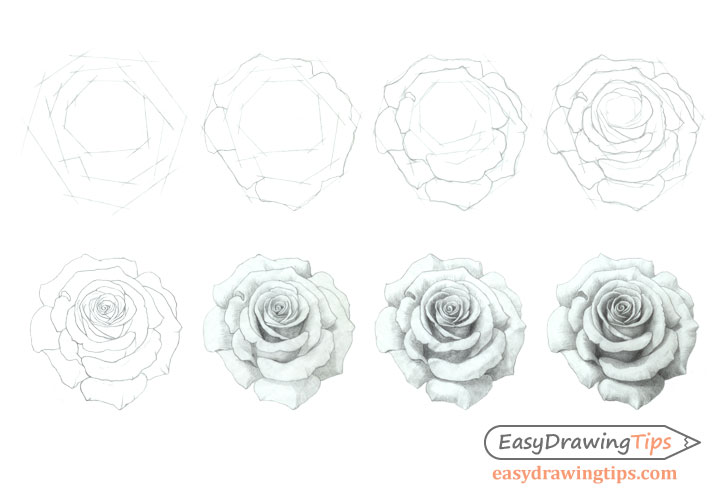
Step 1 - Sketch the Overall Shape & Size of the Rose. Rose outer shape sketch. Start drawing the rose by first sketching its overall shape sizing it to your drawing area. The outer shape sketch does not need to be the exact outline trace of the rose (that will be done in later steps) instead you want to establish a sort of construction frame.

DARYL HOBSON ARTWORK How To Draw A Rose Step By Step
1. Draw a small freehand circle in the center of the page for the center of the rose. 2. Add another irregular oval shape at a diagonal base of the above circle for the first petal. 3. Join a curved line from the small circle to the oval shape for the second petal. 4.
How To Draw A Rose Step By Step For Kids Easy ClipArt Best
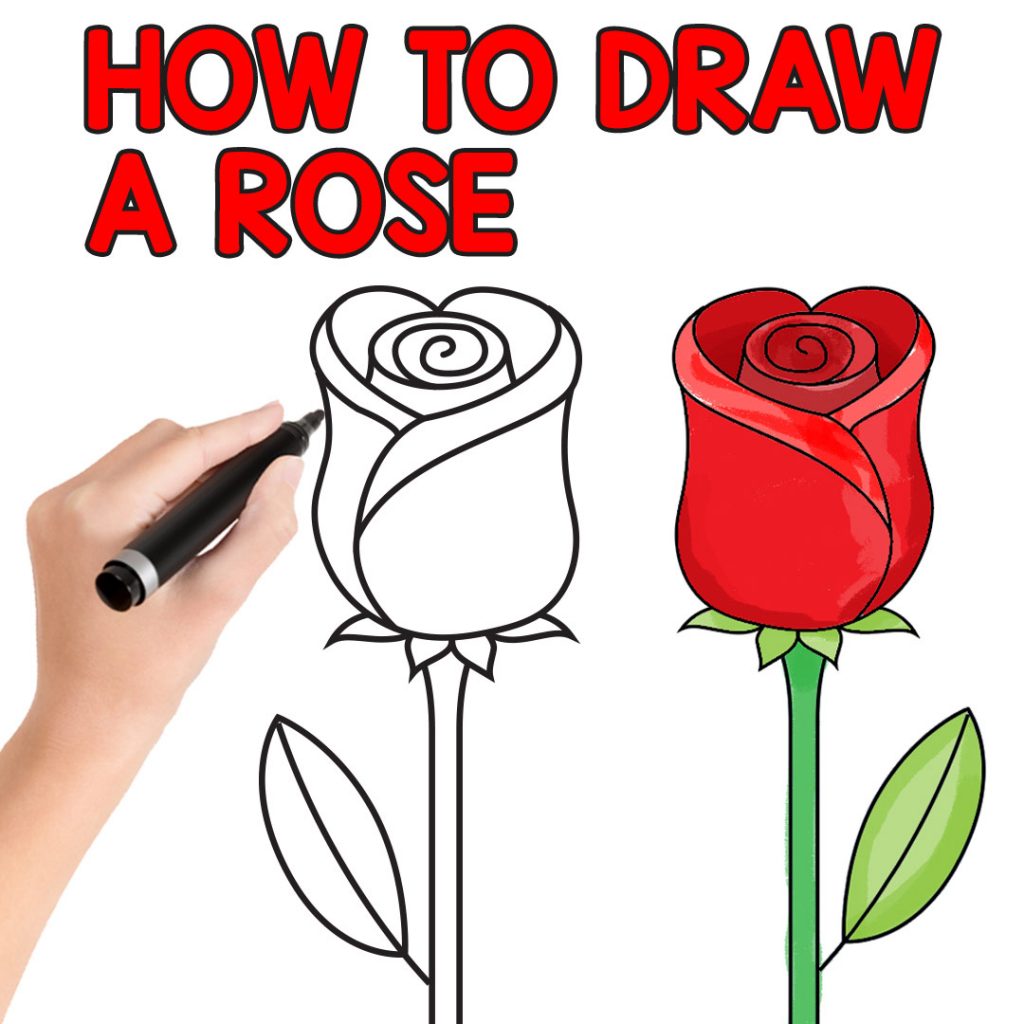
Step 3. Draw little petals inside the realistic rose outline illustration. Step 4. Close those petals into a heart shape—this will be the flower outline drawing of other petals. Step 5. Connect the realistic rose flower outline drawing with the rest of the bud, creating a petal shape. Step 6. One more heart.

Drawing rose
The materials you need for this rose drawing step by step tutorial, are a 6B woodless pencil, Canson drawing paper and a faber castel eraser. How to draw a rose step one - Finding your first petal. Drawing the first rose petal. Start your rose drawing by first choosing one petal. Then draw the form of your one chosen petal as seen in the.

Easy To Draw Rose Step By Step at Drawing Tutorials
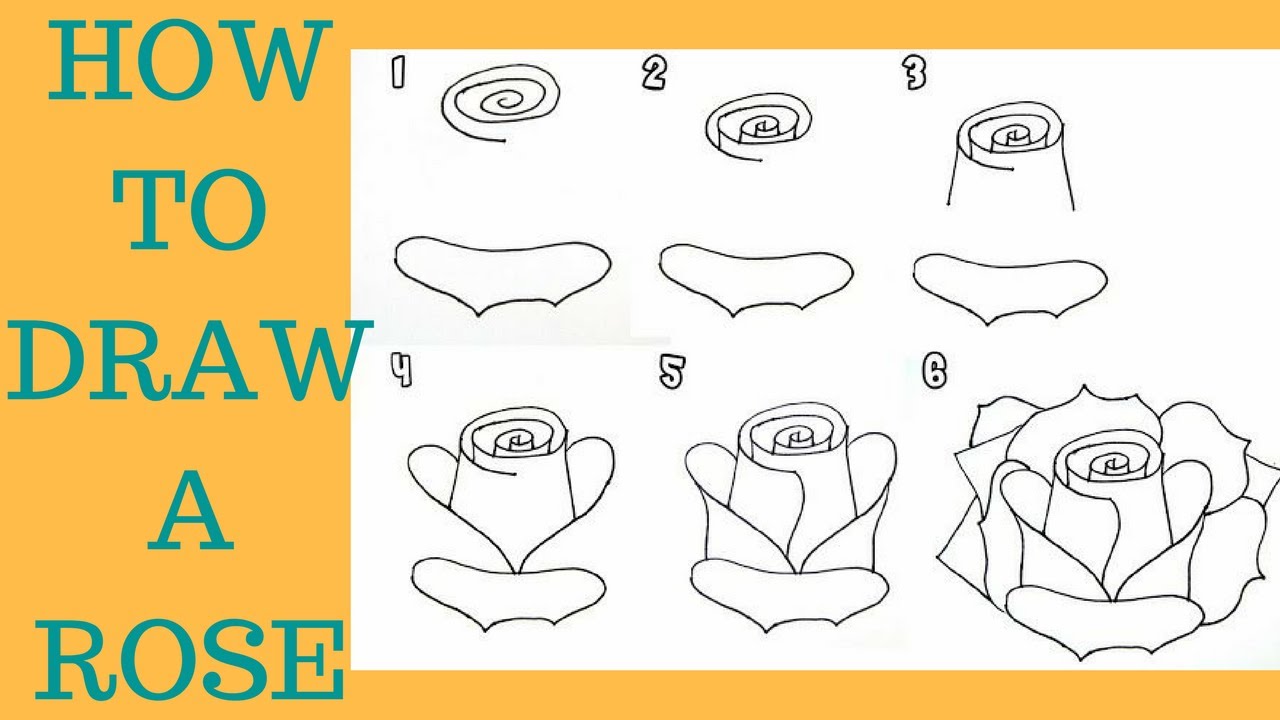
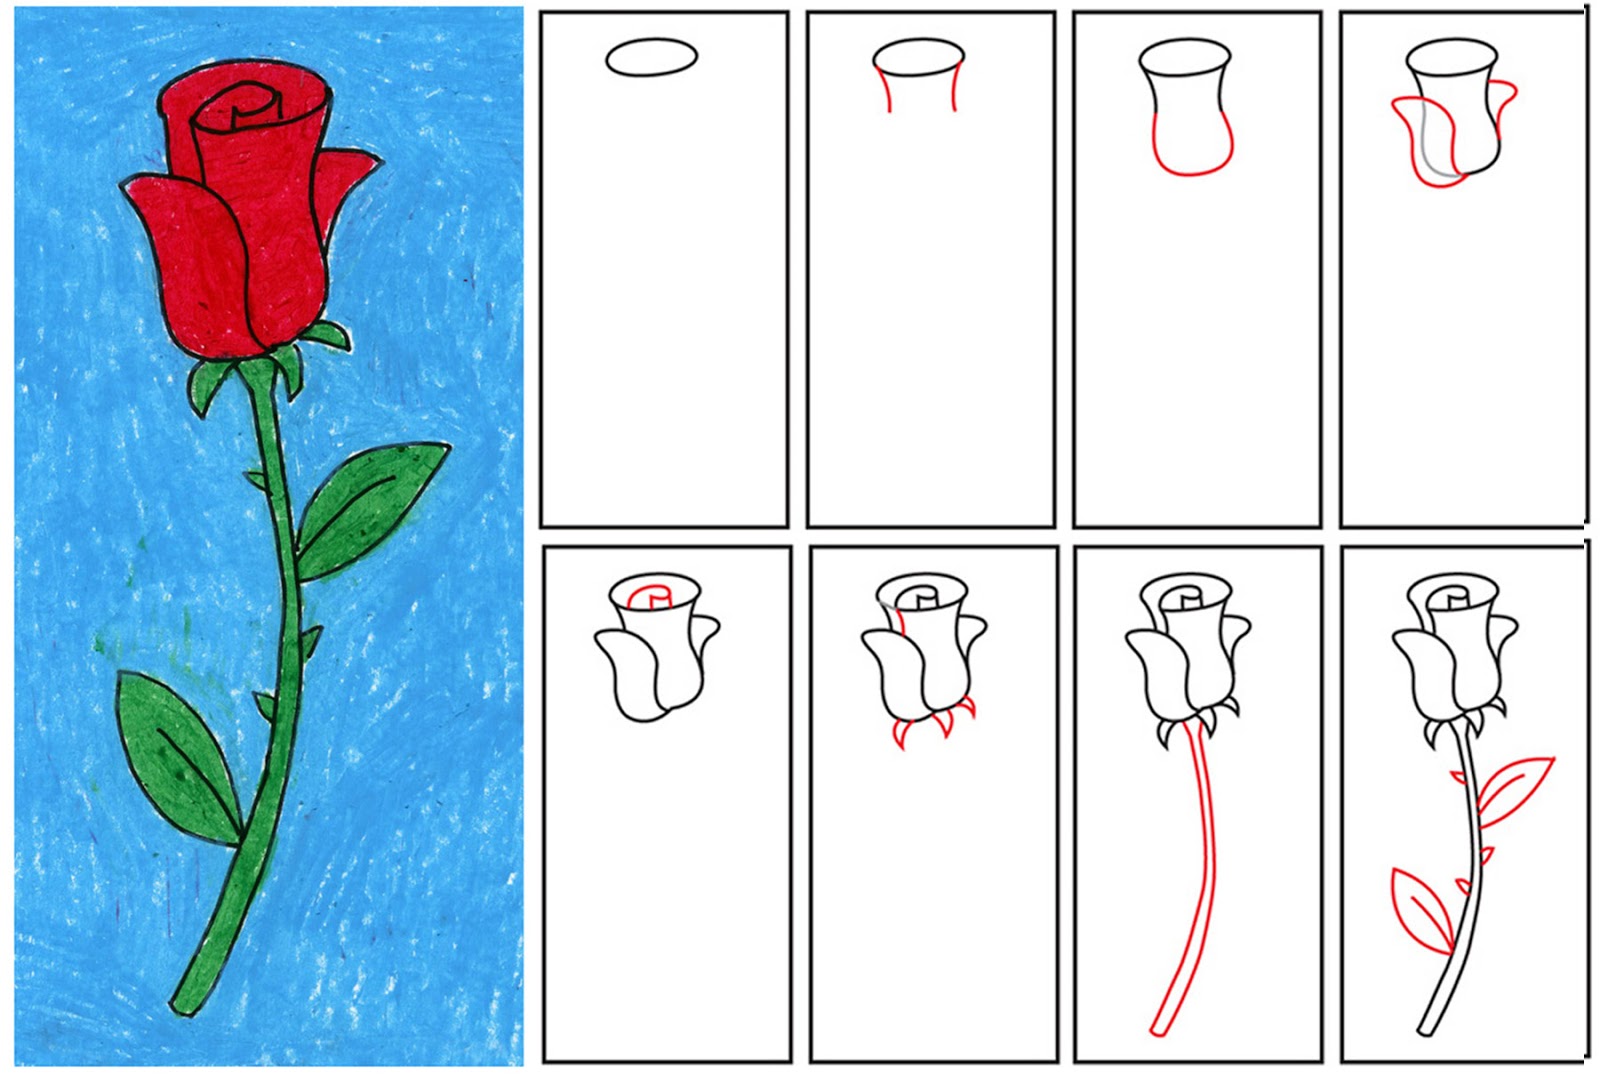
Rose Drawing EASY Step by Step Tutorial. Start by drawing an oval shape, shown in step 1. Now draw a small oval around the beginning oval, making the bottom of the second oval even with the first. See step 2. Next, draw an oval around these, as in step 3. Draw another oval around the tiny shape, keeping the bottoms of the ovals even.
How To Draw Roses Happy Family Art
2 - Now add the upper and lower petals to finish the outer shape. For the inside, add an outer-round shape to the lower part of our moon and to one of the sides as shown below. This will be the guideline for the head of the Rose. Use the technique we learned in the first rose to create the very center portion.