Arduino Push Button with Multiple LEDs [Tutorial] The Robotics BackEnd
How do you turn an LED on and off with a button on Arduino? We set the pinButton variable as integer 8 and we connect the button at pin 8 on the Board. Then the LED is connected to pin 2 using the resistor in series with it. In the setup () function we set the pin 8 as INPUT and pin 2 as OUTPUT.

LED Patterns Arduino LED Pattern Push Button Arduino Tutorial YouTube
Put Resistor 10k B/w Pin1 of Push Button and Gnd of Arduino; Pin2 of Push Button to 5V of Arduino ; STEP # 2 ( Make LED Connections ) +VE Of LED To D13 of Arduino. Resistor 470 B/w -VE Of LED & then Gnd of Arduino. STEP # 3 ( Upload Code ) Application. It can be used to turn on and off any device; It can be used as an indication of power.
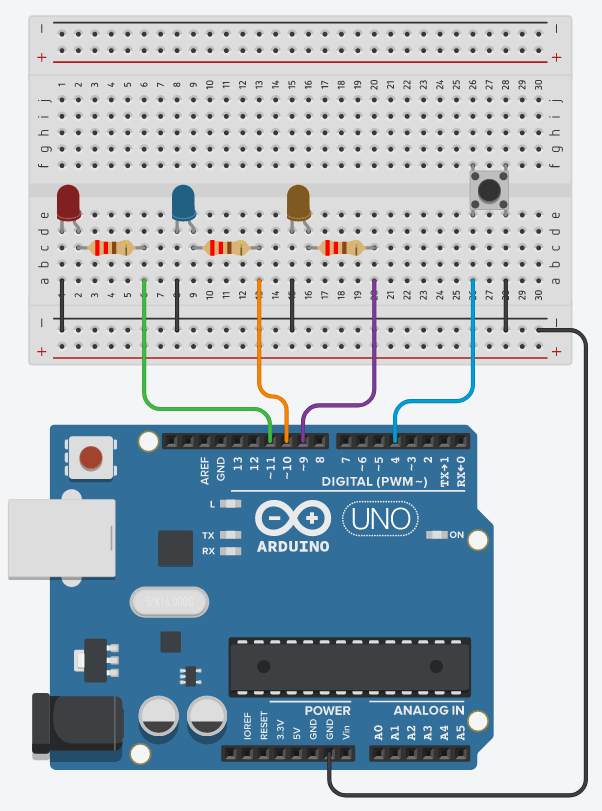
Electronic arduino Controling 4 LEDs with 5 pushbuttons and Arduino Valuable Tech Notes
In this Arduino tutorial you will learn how to work with a push button and multiple LEDs. We will first build the circuit, and then write some code for different applications, each time adding a bit more complexity. In this tutorial, in order to not bloat the instructions too much, I will not explain every detail from scratch.
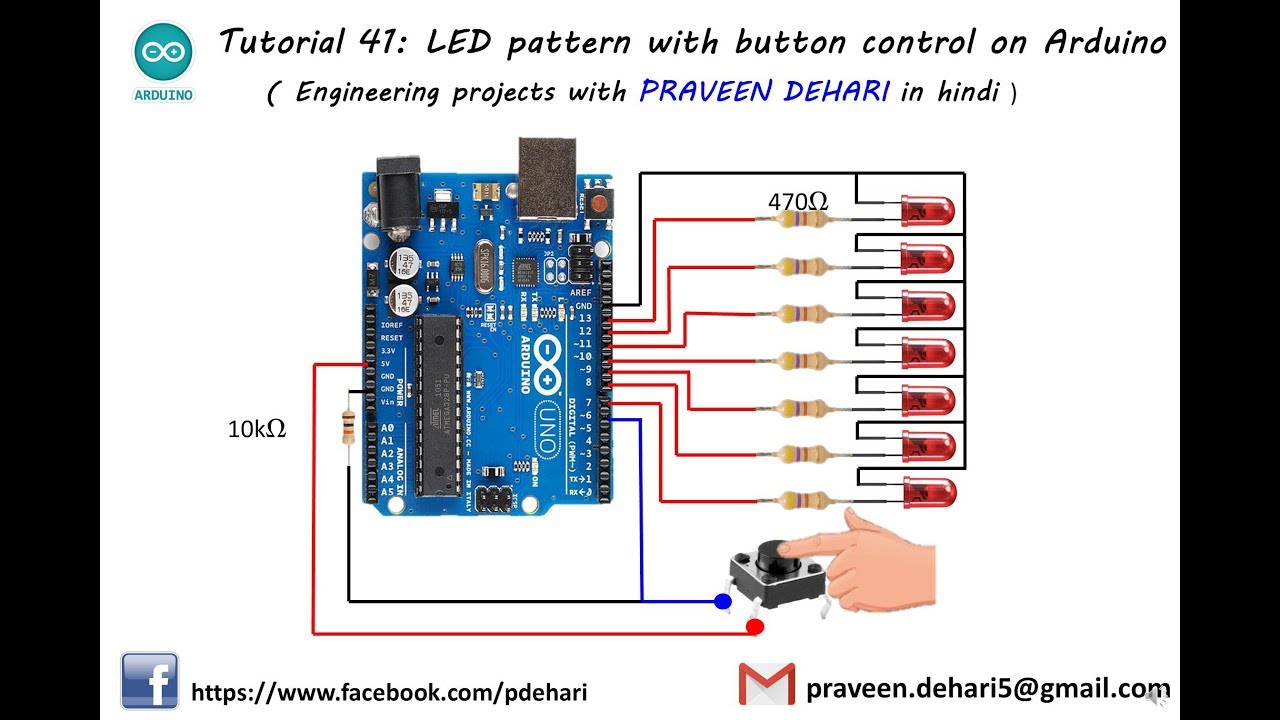
LED pattern with button control on Arduino Tutorial 41 YouTube
In this lesson, we will learn how to detect the state of a button, and then toggle the state of the LED based on the state of the button. Controlling a LED with a button.. Arduino UNO. 1. Pushbutton switch 12mm. 1. Breadboard (generic) 1. LED (generic) 1. Resistor 10k ohm. 1. Jumper wires (generic) 1. Resistor 220 ohm.

Getting Started with Arduino Uno Controlling LED with Push Button
Quick Steps Connect Arduino to PC via USB cable Open Arduino IDE, select the right board and port

Arduino push button led arduino button led projects YouTube
Button. Turns on and off a light emitting diode (LED) connected to digital pin 13, when pressing a pushbutton attached to pin 2. The circuit: - LED attached from pin 13 to ground through 220 ohm resistor. - pushbutton attached to pin 2 from +5V. - 10K resistor attached to pin 2 from ground. - Note: on most Arduinos there is already an LED on.

Arduino LEDs & Buttons YouTube
Steps 8 Introduction Push button switches are inexpensive and versatile components that have many uses. In this guide, we will learn how to use a push button switch together with an Arduino, to turn an LED on and off. The circuit we will be building, uses a Little Bird Uno R3, a fully compatible Arduino development board.
Arduino Uno Push Button to change LED Patterns + Full Code YouTube
Learn how to work with an LED and a Push Button using Arduino. Control the LED with the push button - 2 step by step examples.👉 Complete Arduino Course for.

Menyalakan dan Mematikan LED dengan Push Button Arduino
Find the deal you deserve on eBay. Discover discounts from sellers across the globe. No matter what you love, you'll find it here. Search Arduino push button led and more.
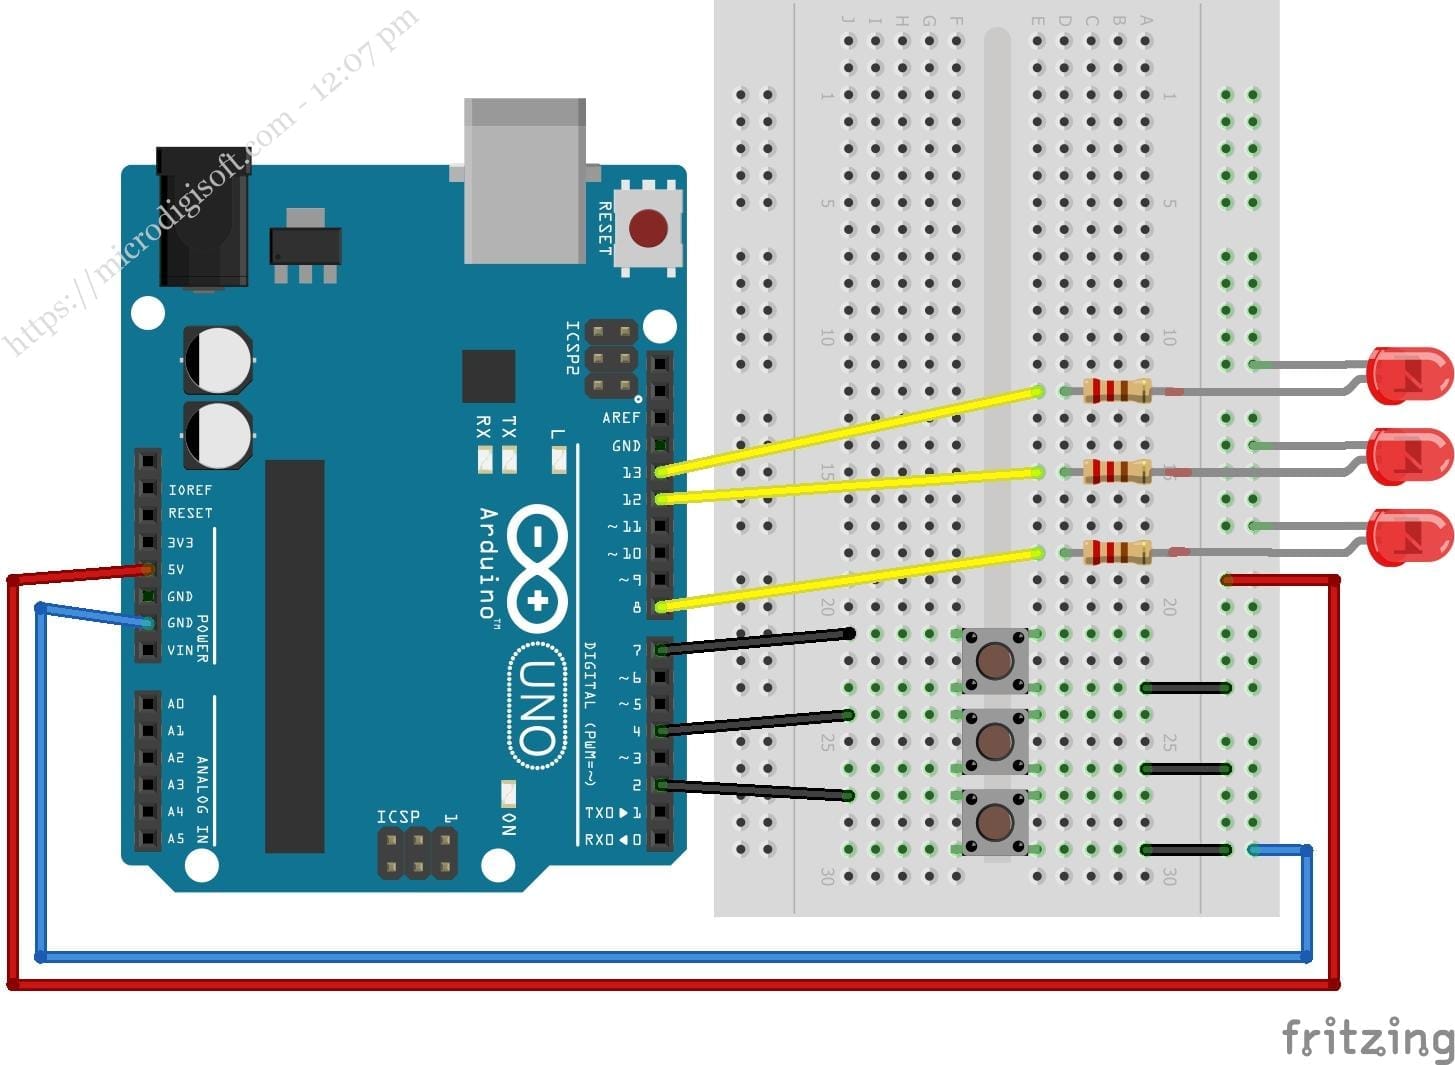
Controlling LEDs with Multiple Push Button Using Arduino
One button will increase the brightness and another will decrease the brightness of the LED. Here you need to make a small circuit like below. Connect the two buttons input to the Arduino pin 12 and 13. Connect the LED +ve pin to Arduino pin 9 and the -ve pin to the ground using a current limiting resistor (220 Ω).

Arduino Uno two buttons & LED YouTube
Step 1: Hardware Required Arduino Uno LED Button 220 and 10k ohm resistors Wires Breadboard Ask Question Step 2: LED Connections LED attach to board Resistor (220 ohm) connect to LED's long leg (+) The wire connect to resistor empty leg After that, same wire connect to digital pin from resistor

Using Push Button RGB LED Color Change Arduino Project YouTube
When the button is pressed, pin 12 is 5V (HIGH). Set the pin 12 as High level by programming and pin 13 (integrated with an LED) as High at the same time. Then release the button (pin 12 changes to LOW) and pin 13 is Low. So we will see the LED lights up and goes out alternately as the button is pressed and released. Step1: Build the circuit.
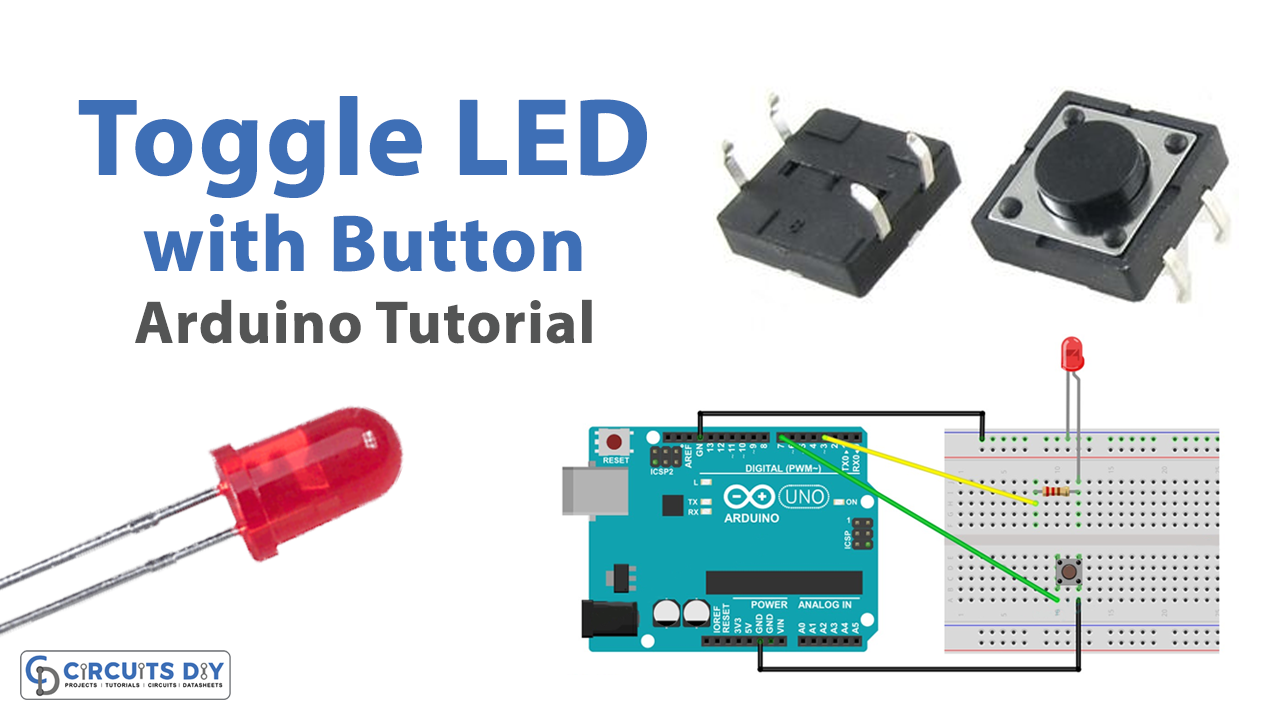
Toggle LED with Button Arduino Tutorial
Step 1: Push Button and the Serial Monitor. If you put this code into your Arduino , when you open the serial monitor and push the button it will come up as 1. int BUTTON1 = 7; void setup () { Serial.begin (9600); pinMode (BUTTON1,INPUT); } void loop () { Serial.println ( ); if (digitalRead (BUTTON1) == HIGH) { Serial.println ("Button1 1"); }else {
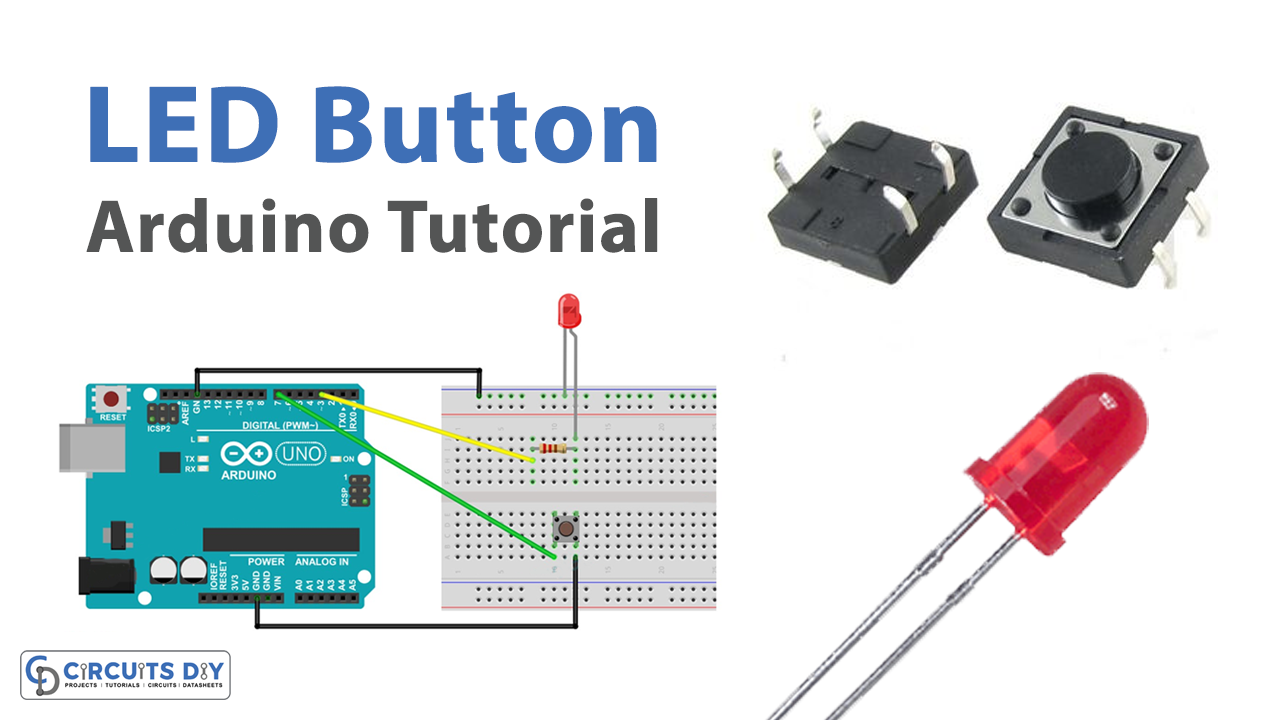
Control LED with Push Button Arduino Tutorial
Temperature, Relay, Motion, Touch, GPS, CAN and Much More. Huge Range of Microcontroller Sensor Modules and Interface Boards
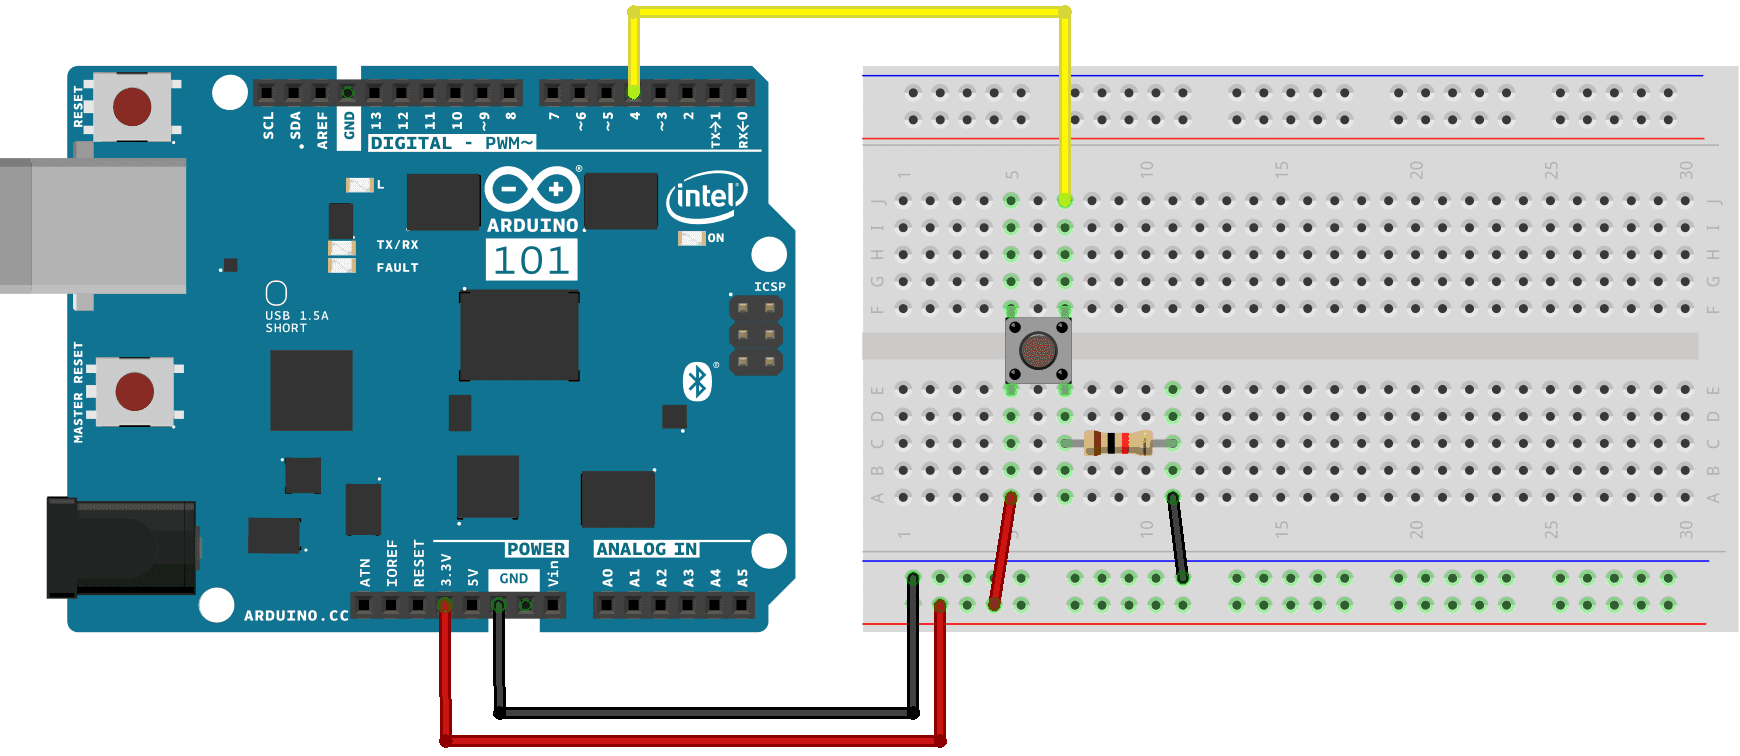
Arduino 101 CurieBLE Button LED Arduino Documentation
To create an Arduino button toggle action, we'll follow the steps below: Define an output pin (for the LED) Define an input pin (for the push button) Read the button input pin If the button is pressed: flip the pin state And this is simply what we need to do in order to achieve button toggle action for the LED using Arduino.
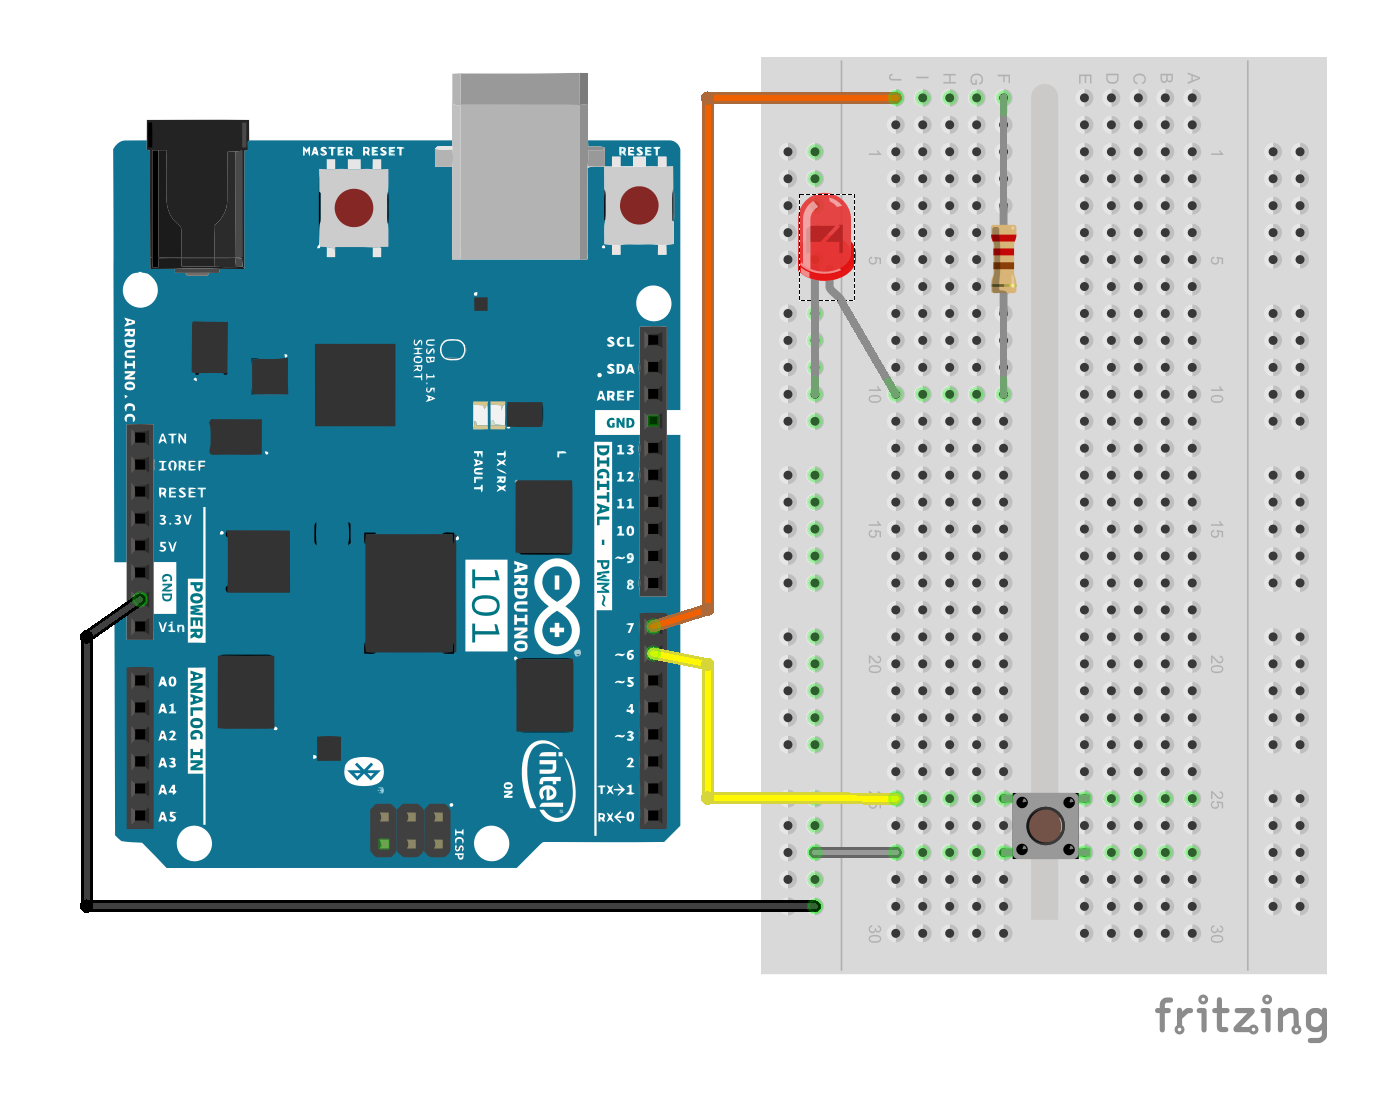
Arduinoer Arduino/Genuino 101 example to read button and turn ON/OFF LED
1. Floating input problem: Symptom: the reading value from the input pin is not matched with the button's pressing state. Cause: input pin is NOT used pull-up or pull-down resistor. Solution: Use pull-up or pull-down resistor. It will be described in this tutorial 2. Chattering phenomenon: